Getting Started with Supportivo
Installation
- From your WordPress admin, go to Plugins → Add New, search for Supportivo Core, and click Install Now, then Activate. (If you purchased the premium version, upload the
.zipfile instead via Plugins → Add New → Upload Plugin.) - That's it — no separate configuration file to edit. As soon as the plugin activates, it creates its database tables and a first set of pages for you automatically.
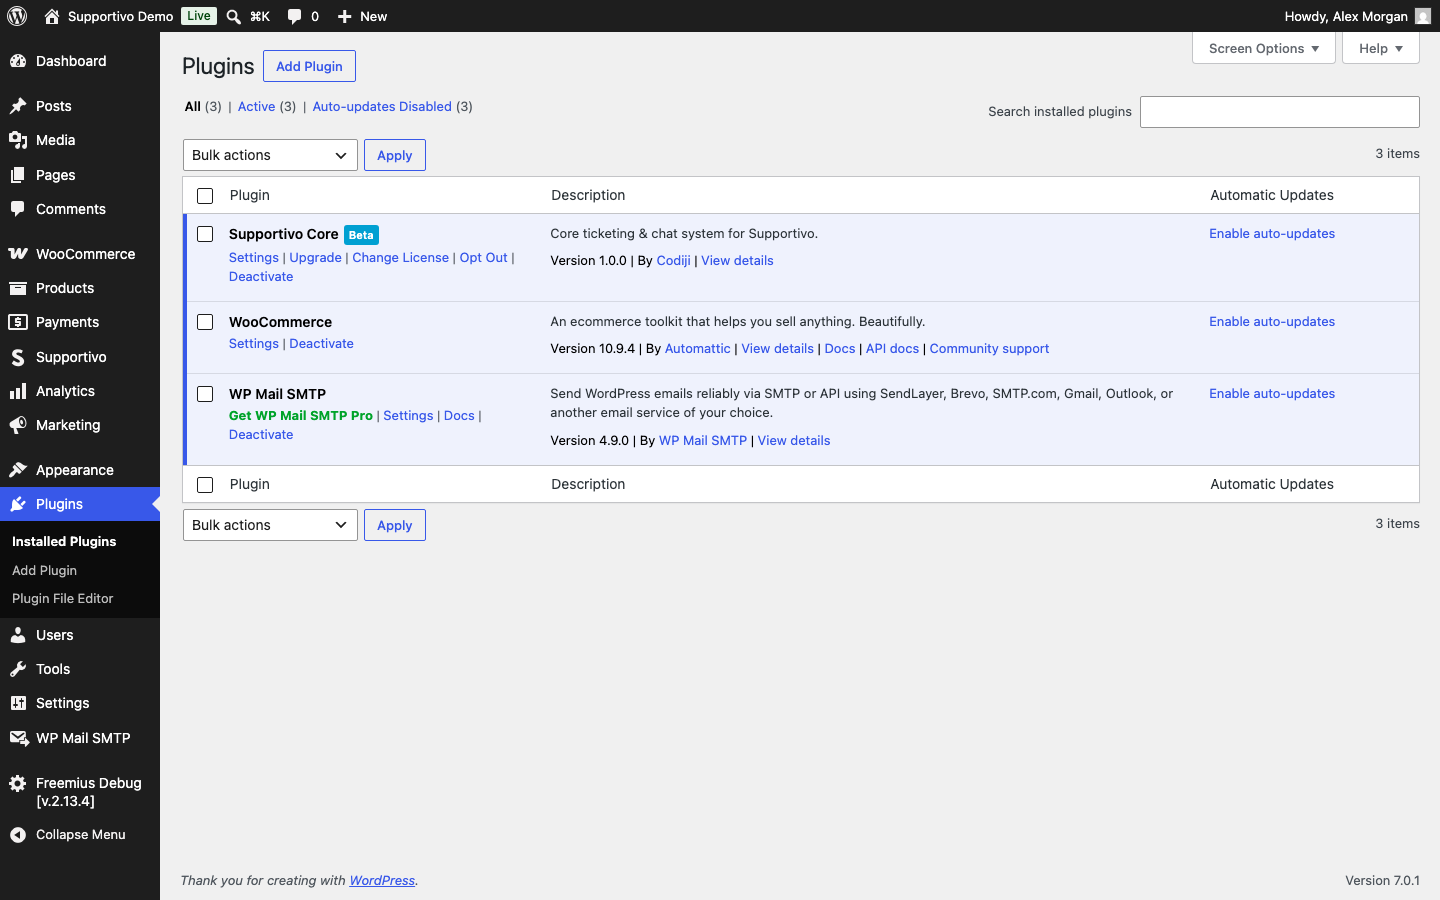
Right after activation you'll see a green notice at the top of your admin listing the pages that were just created, with clickable links to each one. We'll cover exactly what those pages are later in this article — first, let's walk through the Setup Wizard, which is the best way to configure everything correctly on day one.
Supportivo works out of the box on the Free plan with a simple ticket form. Upgrading to Premium unlocks extra Setup Wizard steps (Business Type, WooCommerce, Import) plus features like Staff Management, WooCommerce Support Packages, and Custom Email Templates. This article shows the full Premium wizard; if you're on Free, some steps below simply won't appear for you, and that's expected — see the note under each relevant step.
The Setup Wizard
After activation, click Start Setup on the admin notice (or go to it directly from your dashboard) to launch the wizard. At the top of every screen you'll see a progress bar showing which step you're on, and a Skip setup link in case you'd rather configure things manually later — you can always re-run the wizard afterward.
Step 1 — Welcome
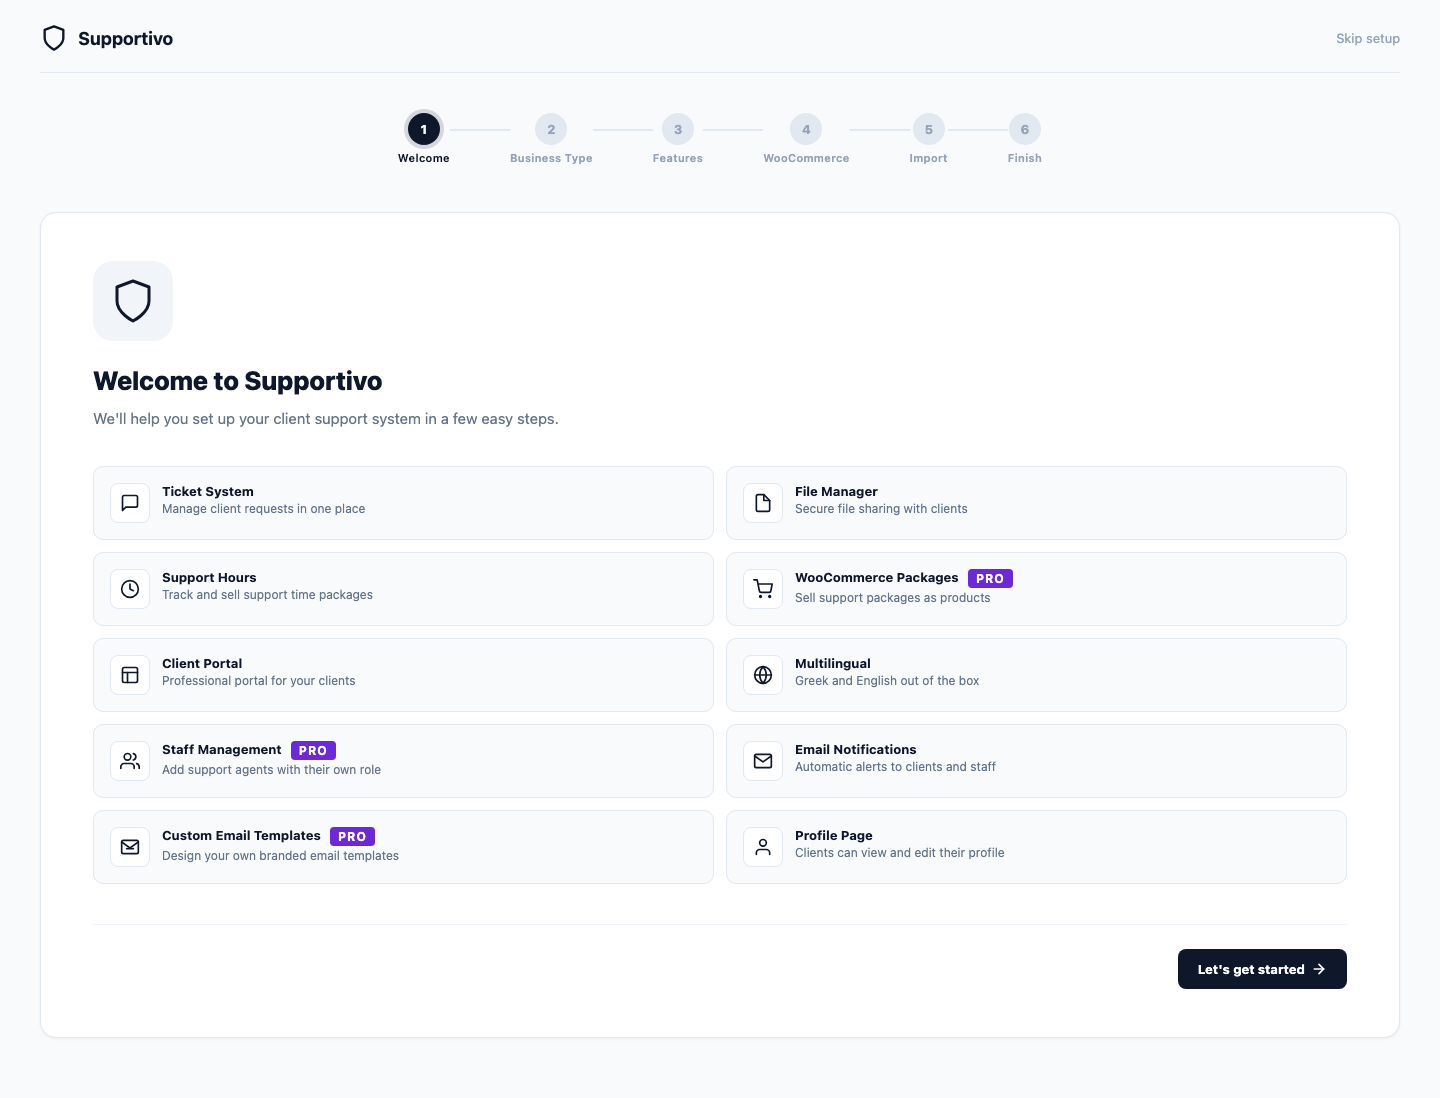
This is just an introduction screen. It shows a grid of all the features Supportivo offers — things like the Ticket System, File Manager, Support Hours, Client Portal, Multilingual support, and (marked with a PRO badge) premium-only features like WooCommerce Packages, Staff Management, and Custom Email Templates.
Nothing to configure here — it's just so you know what's coming. When you're ready, click Let's get started.
Step 2 — Business Type (Premium only)
Here you tell Supportivo what kind of business you run, so it can set up ticket categories that already make sense for your work instead of generic ones you'd have to build from scratch.
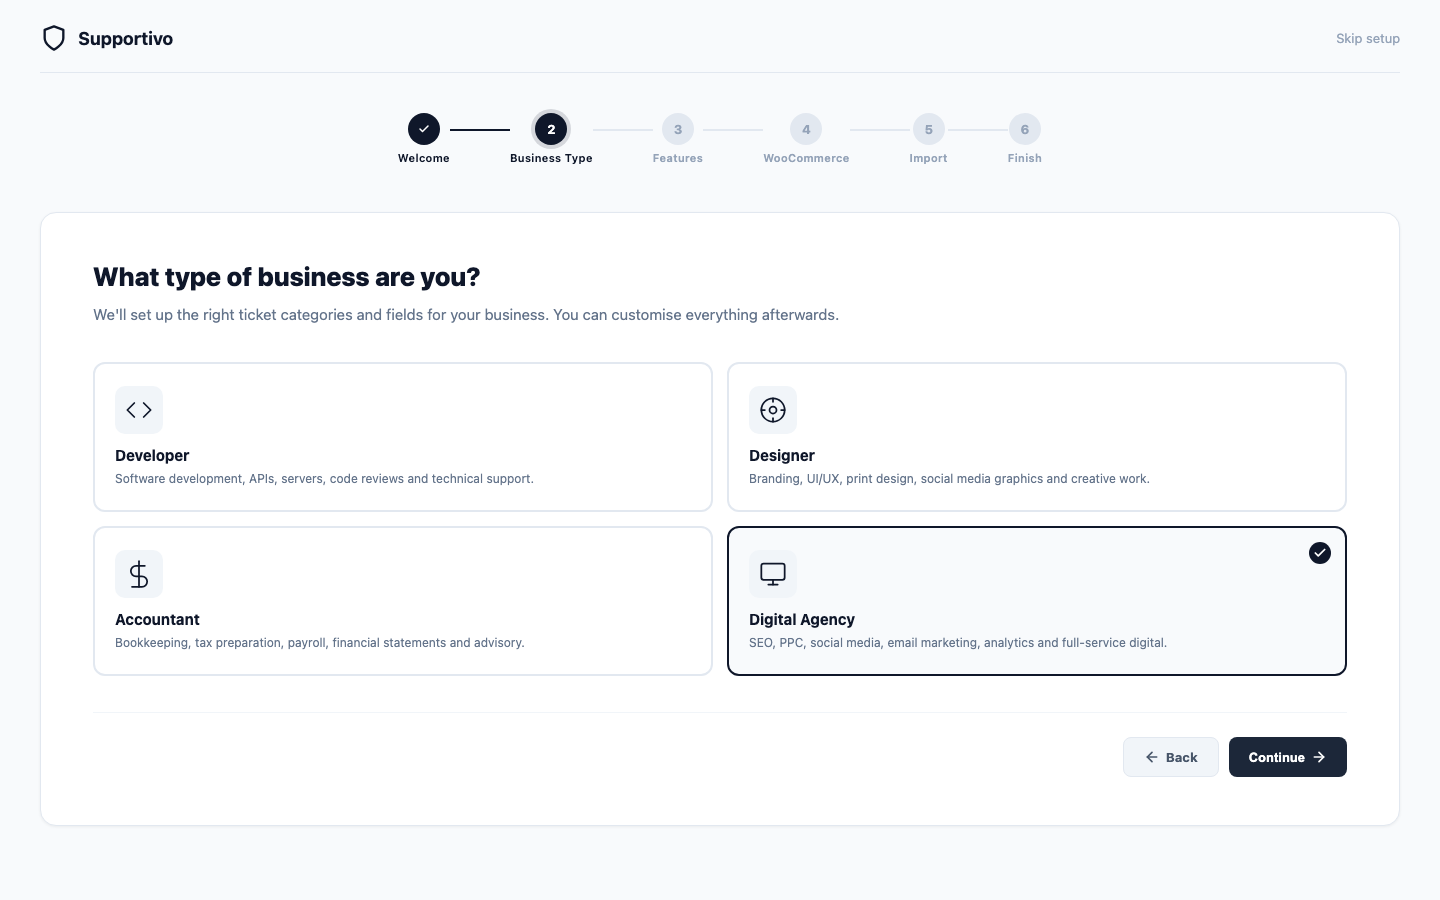
You'll see four cards to choose from:
- Developer — for software development, APIs, servers, code reviews, and technical support requests.
- Designer — for branding, UI/UX, print design, social media graphics, and other creative work.
- Accountant — for bookkeeping, tax preparation, payroll, financial statements, and advisory work.
- Digital Agency — for SEO, PPC, social media, email marketing, analytics, and full-service digital work.
Click a card to select it (it highlights with a checkmark). This choice pre-fills the right ticket categories and custom fields for your industry — but don't worry, you can always add, remove, or edit categories later from Settings, so this isn't a permanent decision.
The Continue button stays greyed out until you pick one.
This step doesn't appear at all — all business templates are a Premium feature. Free users go straight from Welcome to the Features step below, and always get a simple, ready-to-use ticket form.
Step 3 — Features
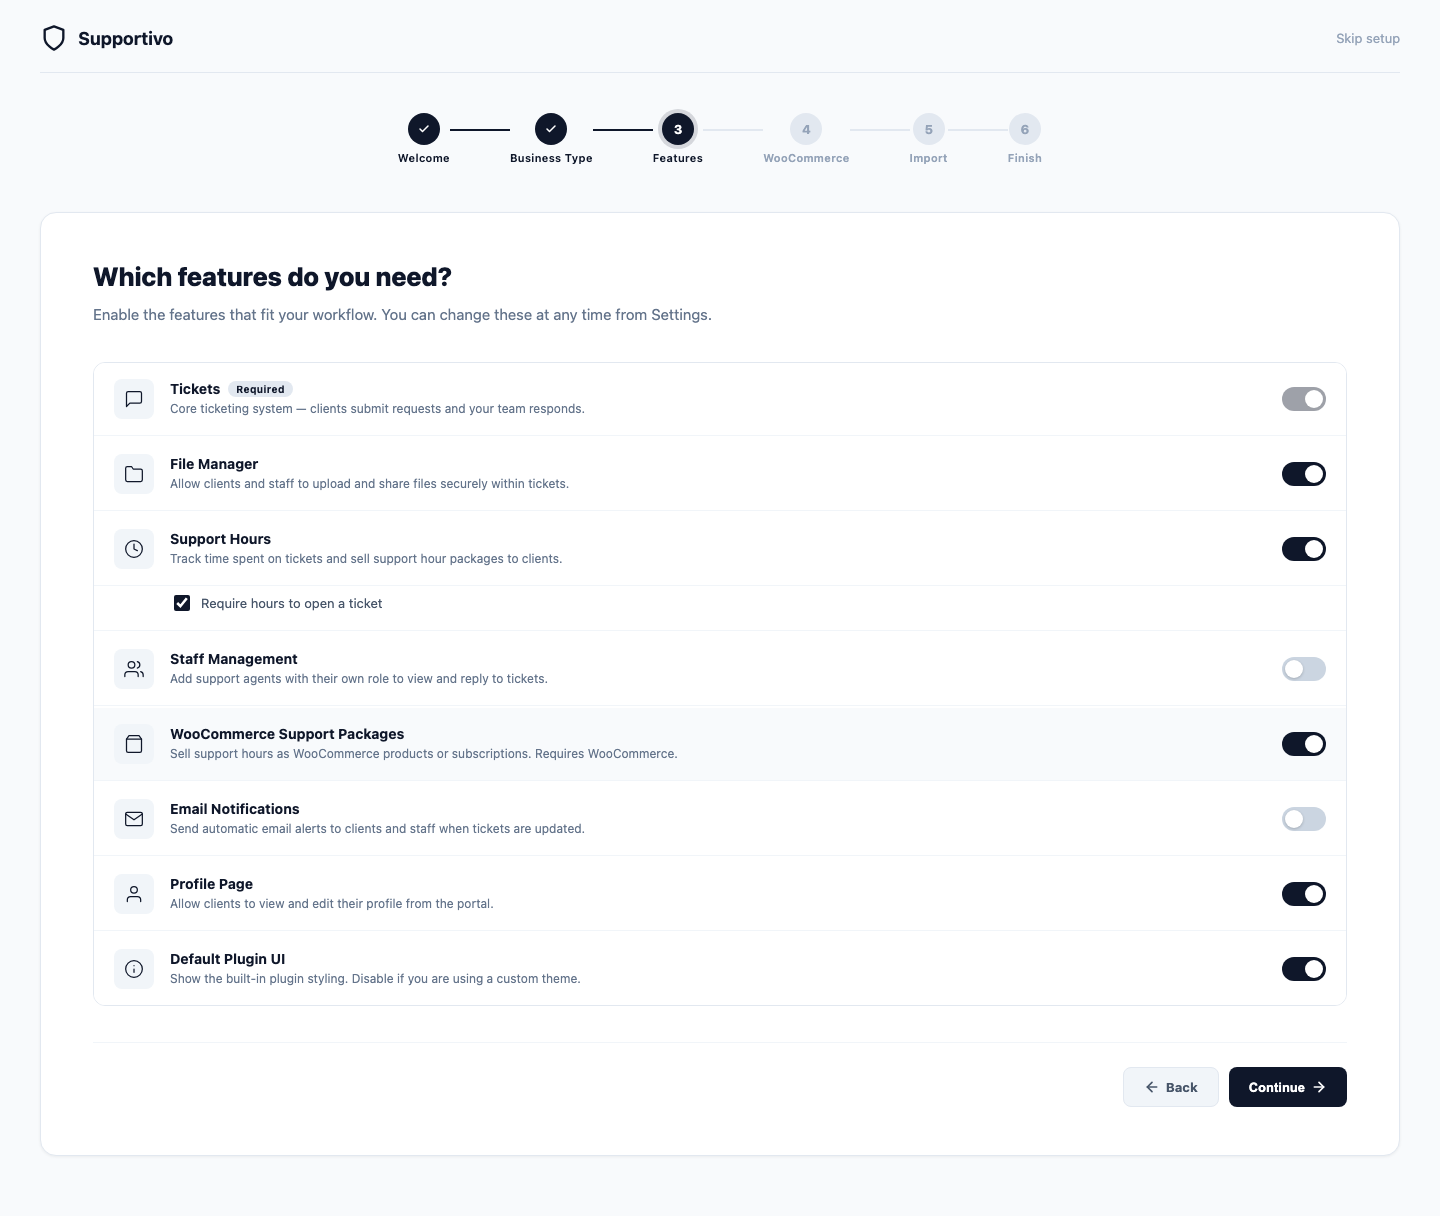
This is the heart of the wizard: a list of toggle switches, one per feature, so you can turn on only what you actually need. Everything here can be changed later from Settings, so don't stress over getting it perfect the first time.
- Tickets — the core ticketing system. This one is always on and can't be switched off — it's the foundation everything else builds on.
- File Manager — lets clients and your team attach and share files securely inside a ticket, instead of emailing attachments back and forth.
- Support Hours — lets you track how much time you spend on each ticket, and (if you sell packages) how many hours a client has left. Turning this on reveals an extra sub-option: "Require hours to open a ticket" — if you enable that too, clients won't be able to submit a new ticket unless they still have hours remaining. Leave it off if you want anyone to be able to open a ticket regardless of hours.
- Staff Management (PRO) — lets you add support agents/employees who can log in and respond to tickets under their own account, rather than everything going through your main admin login. On Free, this shows an Upgrade link instead of a toggle.
- WooCommerce Support Packages (PRO) — turns your support hours into products clients can actually buy from your WooCommerce store (e.g., "10 hours of support for €179"). Turning this on adds a dedicated WooCommerce step right after this one. On Free, this also shows an Upgrade link.
- Email Notifications — automatically emails clients and staff when something happens on a ticket (new reply, status change, etc.), so nobody has to keep refreshing the dashboard to check for updates.
- Profile Page — gives each client a small page in the portal where they can view and edit their own contact details.
- Default Plugin UI — this controls whether Supportivo uses its own built-in visual styling for the client-facing pages. Turn it off only if your WordPress theme already has its own styling you want to apply instead, otherwise leave it on.
When you're happy with your selections, click Continue.
This depends on your choices: if you're on Premium and turned on WooCommerce Support Packages, you'll go to the WooCommerce step next. If you're on Premium but left that off, you'll skip ahead to Import. If you're on Free, this is actually your last step — clicking Continue takes you straight to Finish, since Free accounts automatically get the "Simple" ticket form with no further choices needed.
Step 4 — WooCommerce (Premium only, and only if you enabled WooCommerce Support Packages in the previous step)
What you see here depends on whether WooCommerce is already installed on your site.
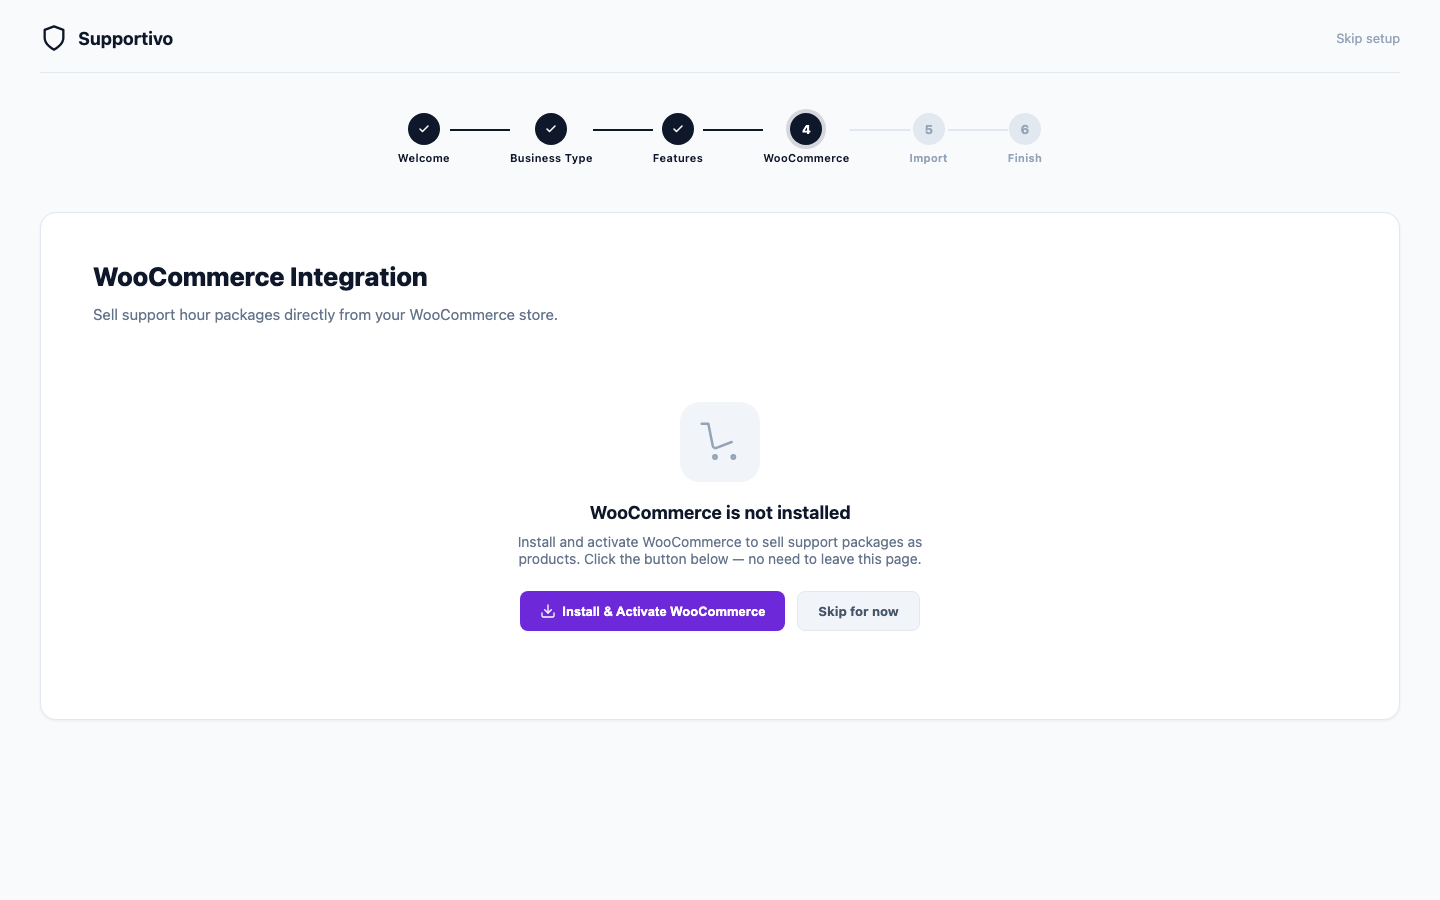
If WooCommerce is not installed yet: You'll see a message explaining that you need it to sell support packages, with a button Install & Activate WooCommerce. Click it and Supportivo installs and activates WooCommerce for you automatically, right there on the page — you don't need to leave the wizard or find it in the plugin directory yourself. If you'd rather do this later, click Skip for now and continue without it.
If WooCommerce is installed: You'll see a set of toggles instead:
-
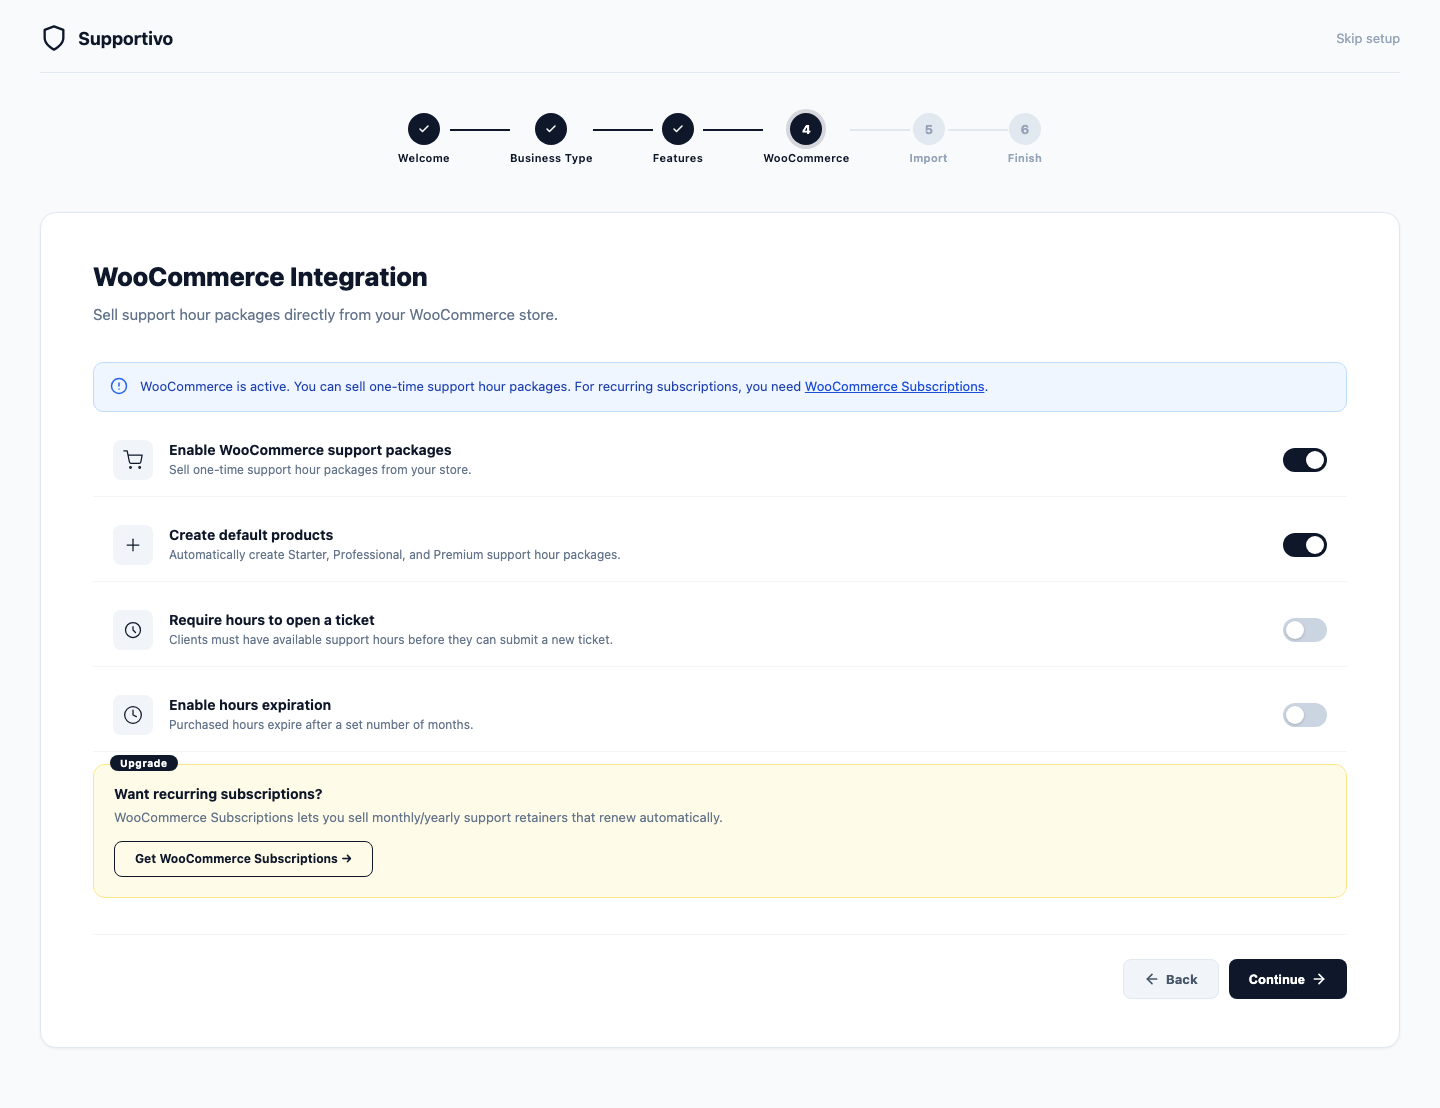
Enable WooCommerce support packages — the master switch for this whole feature. Turn it on to actually let clients purchase support hours through your store.
-
Create default products — if enabled, Supportivo automatically creates three ready-made products for you: Starter (5 hours / €99), Professional (10 hours / €179), and Premium (20 hours / €329). This saves you from setting up products manually — you can rename, reprice, or delete them anytime from WooCommerce afterward.
Both this toggle and Enable WooCommerce support packages above come switched on by default as soon as you reach this step — you don't need to turn them on yourself. You're free to turn either off if you're not ready to sell packages yet.
-
Require hours to open a ticket — same idea as the toggle from Step 3: if turned on, clients need available hours before they're allowed to submit a ticket.
-
Enable hours expiration — if turned on, purchased hours won't last forever; a new field appears letting you set how many months until they expire (e.g., 12 months). Leave this off if you'd rather hours never expire.
If you also have the separate WooCommerce Subscriptions plugin active, you'll see a confirmation message that recurring/subscription-based packages are available too, alongside a small upsell card if you don't have it, pointing you to where you could get it to offer monthly/yearly retainer plans instead of one-time purchases.
Click Continue when you're done.
Step 5 — Import (Premium only)
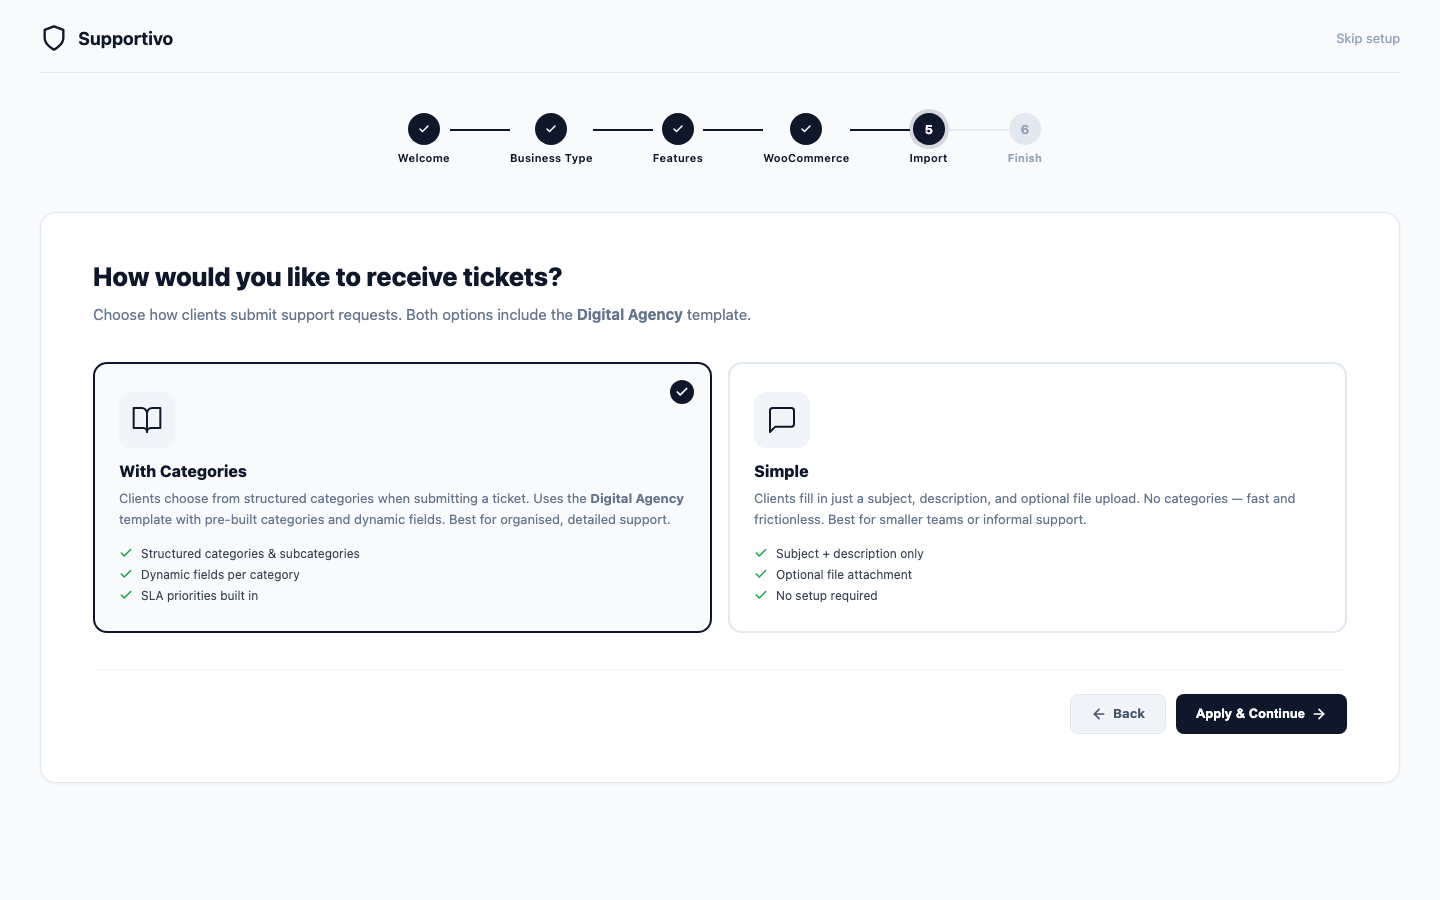
This step decides how clients will actually fill out the "New Ticket" form — and it's simply a choice between two styles:
- With Categories — clients pick from a structured list of categories (using the business template you chose in Step 2) and the form shows different fields depending on which category they pick, plus built-in response-time priorities (SLAs). Best if you want organized, detailed support requests.
- Simple — clients just type a subject, a description, and optionally attach a file. No categories, no extra fields, nothing to configure. Best for smaller teams or a more casual support process.
Click the card you prefer, then Apply & Continue.
Step 6 — Finish
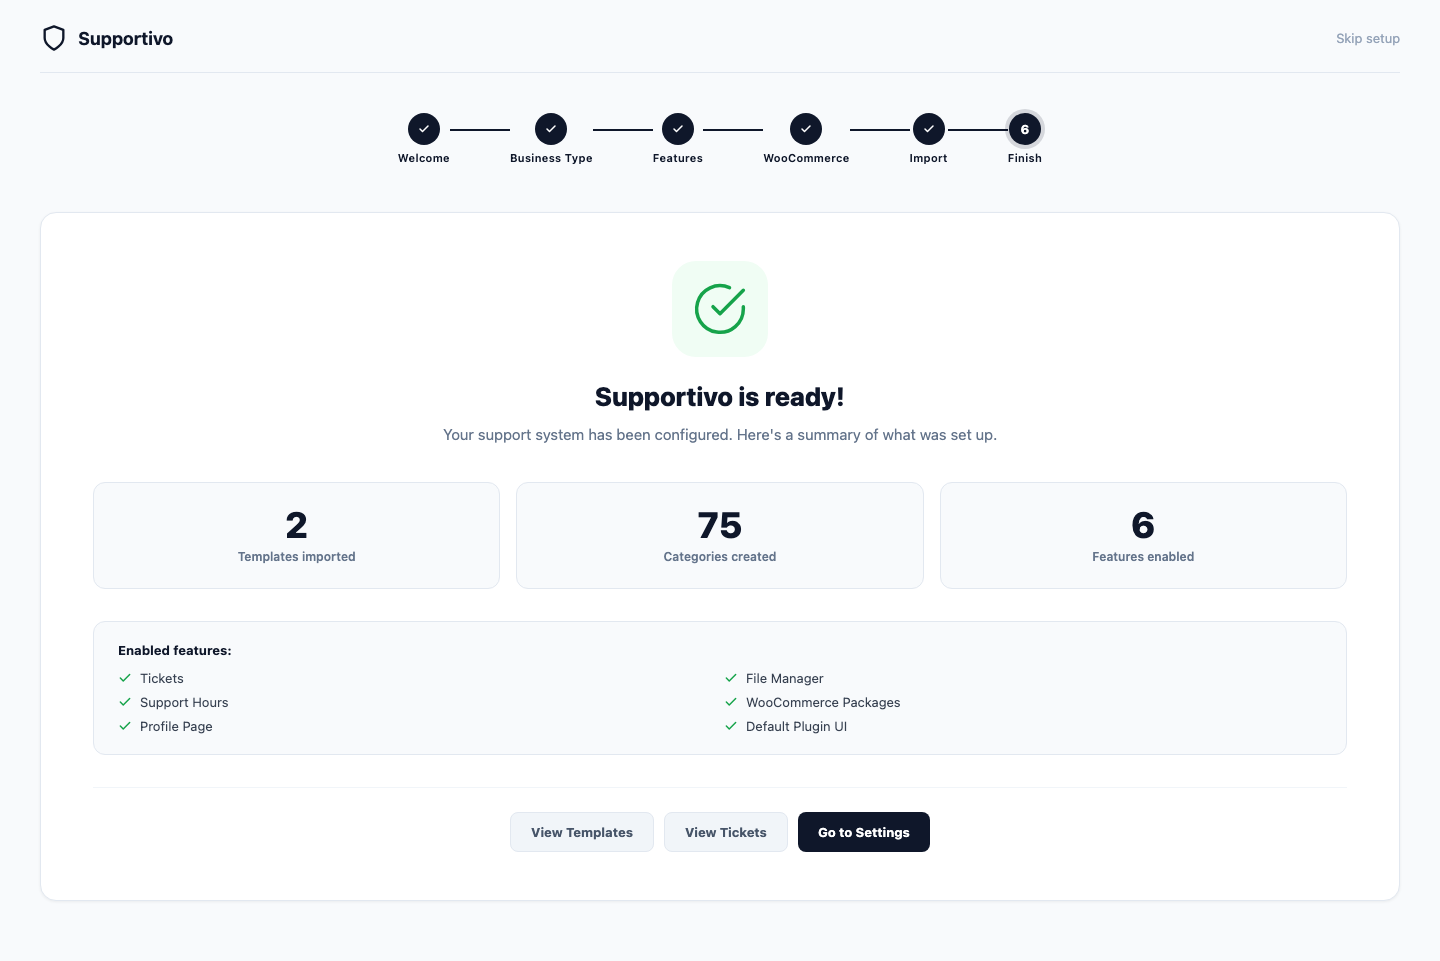
This last screen isn't something you fill in — it's a summary of everything the wizard just built for you behind the scenes: which ticket templates were imported, how many categories were created, how many features you enabled, and (if applicable) how many WooCommerce packages were created.
Below the summary, you'll see a checklist of every feature you turned on during Step 3.
From here you have three buttons to jump straight into using Supportivo:
- View Templates — see the ticket template(s) that were just imported.
- View Tickets — go straight to your ticket inbox.
- Go to Settings — fine-tune anything from the wizard afterward.
After Setup Completes
While the Finish step runs, Supportivo automatically creates a set of front-end pages for your client portal — these are real WordPress pages, so you can find them anytime under Pages in your admin, move them in your menu, or even edit their surrounding page content (just don't remove the shortcode inside them).
Depending on what you enabled, the pages created are:
| Page | What it's for |
|---|---|
| Login | Where clients sign in to access their support portal. |
| Dashboard | The client's home screen after logging in — an overview of their tickets and account. |
| Tickets | The list of all the client's support tickets. |
| Ticket | The detail view of a single ticket (opened automatically when a client clicks into one from the Tickets page). |
| My Files | Where clients can view and manage files shared with your team. |
| Support Hours | Shows a client how many support hours they have left, if you enabled that feature. |
| Buy Support Hours | Lets clients purchase more hours via WooCommerce — only created if you're on Premium, have WooCommerce active, and enabled support-package sales. |
| My Profile | Where clients can view/edit their own contact details, if you enabled the Profile module. |
The next time you load your WordPress admin, you'll see a one-time green notice confirming which of these pages were created, each one shown as a clickable link so you can preview them immediately.

From there, the most useful next steps are:
- Click through a couple of the portal links yourself to see what your clients will see.
- Visit Settings to fine-tune anything (business hours, email templates, categories, etc.).
- Send the Login page link to your first client so they can create an account and submit their first ticket.