Ticket Management
How Clients Create a Ticket
Clients don't go to a separate page to open a ticket — anywhere they see a Create Ticket button (their Dashboard or the Tickets page), clicking it opens a form in a pop-up window right on top of the current page.
What's inside that form depends on which mode you picked in the Setup Wizard's Import step (see Getting Started):
With Categories (Premium):
- Category — a required dropdown of your top-level categories (e.g., "Bug Report", "Billing Question").
- Subcategory, and sometimes a third-level Specific Issue dropdown — these appear only after a category is picked, narrowing things down step by step.
- Dynamic fields (Premium) — depending on the exact category/subcategory chosen, extra fields can appear automatically (for example, a "Website URL" field for a bug report). These are configured per-category from your template settings.
- Priority is set automatically (Premium) — based on the category chosen, clients never pick a priority themselves. Each category carries its own SLA priority behind the scenes.
Simple (Free):
- Just Subject and Description — no categories, no extra fields. This is what every Free install gets; category-based ticketing above is a Premium-only mode.
Both modes also include:
- Domain — a dropdown to pick which of the client's registered sites/domains the ticket is about (only shown if the client has more than one domain on file).
- Attachments — a drag-and-drop area to attach files right when opening the ticket (only shown if File Manager is enabled).
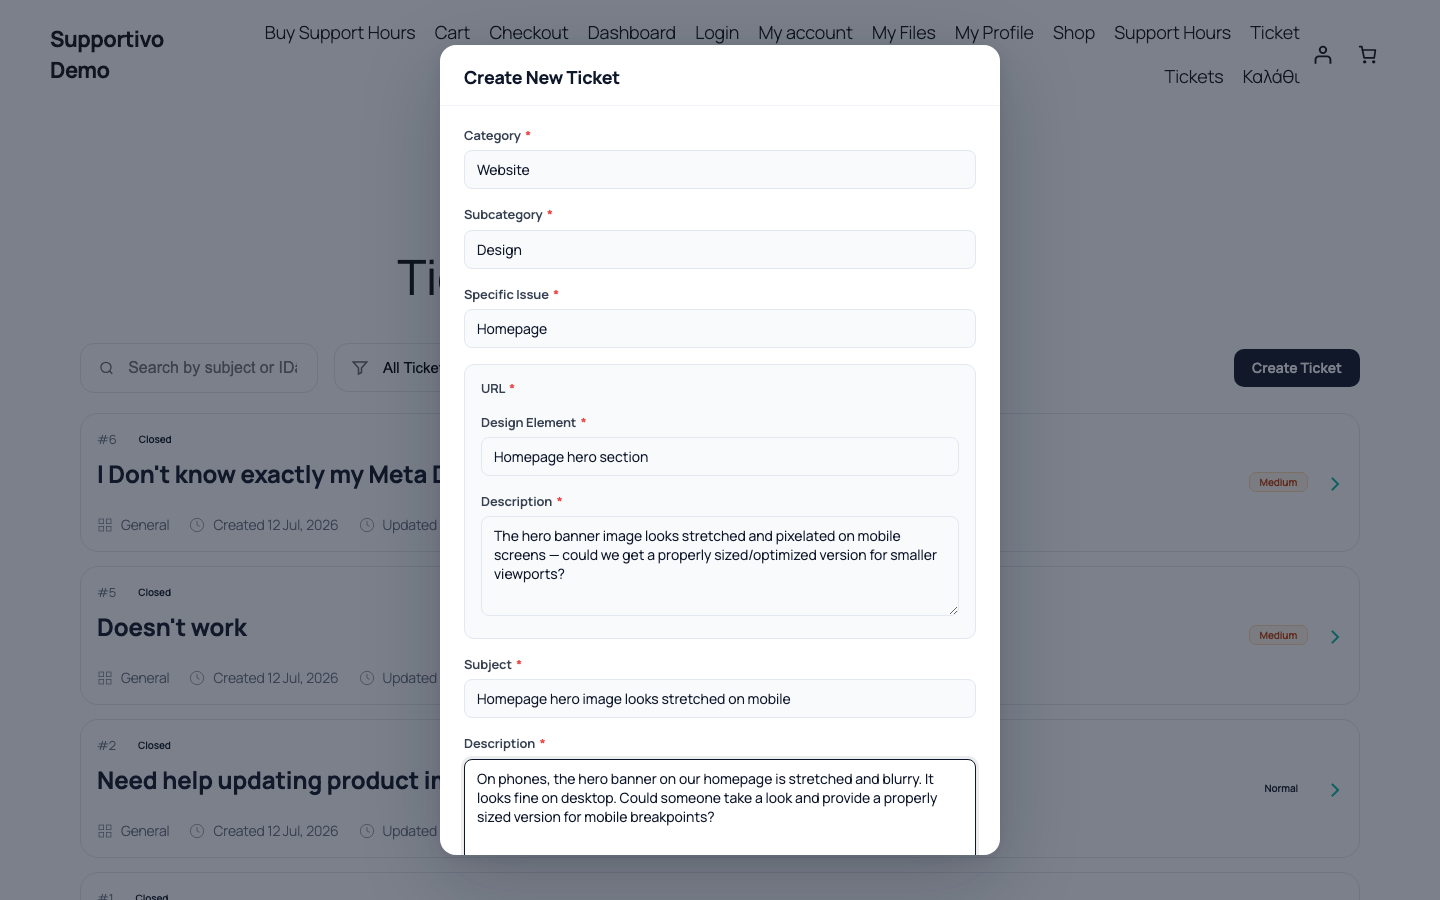 Shown with the Twenty Twenty-Five default WordPress theme active — your frontend may look different depending on your site's active theme.
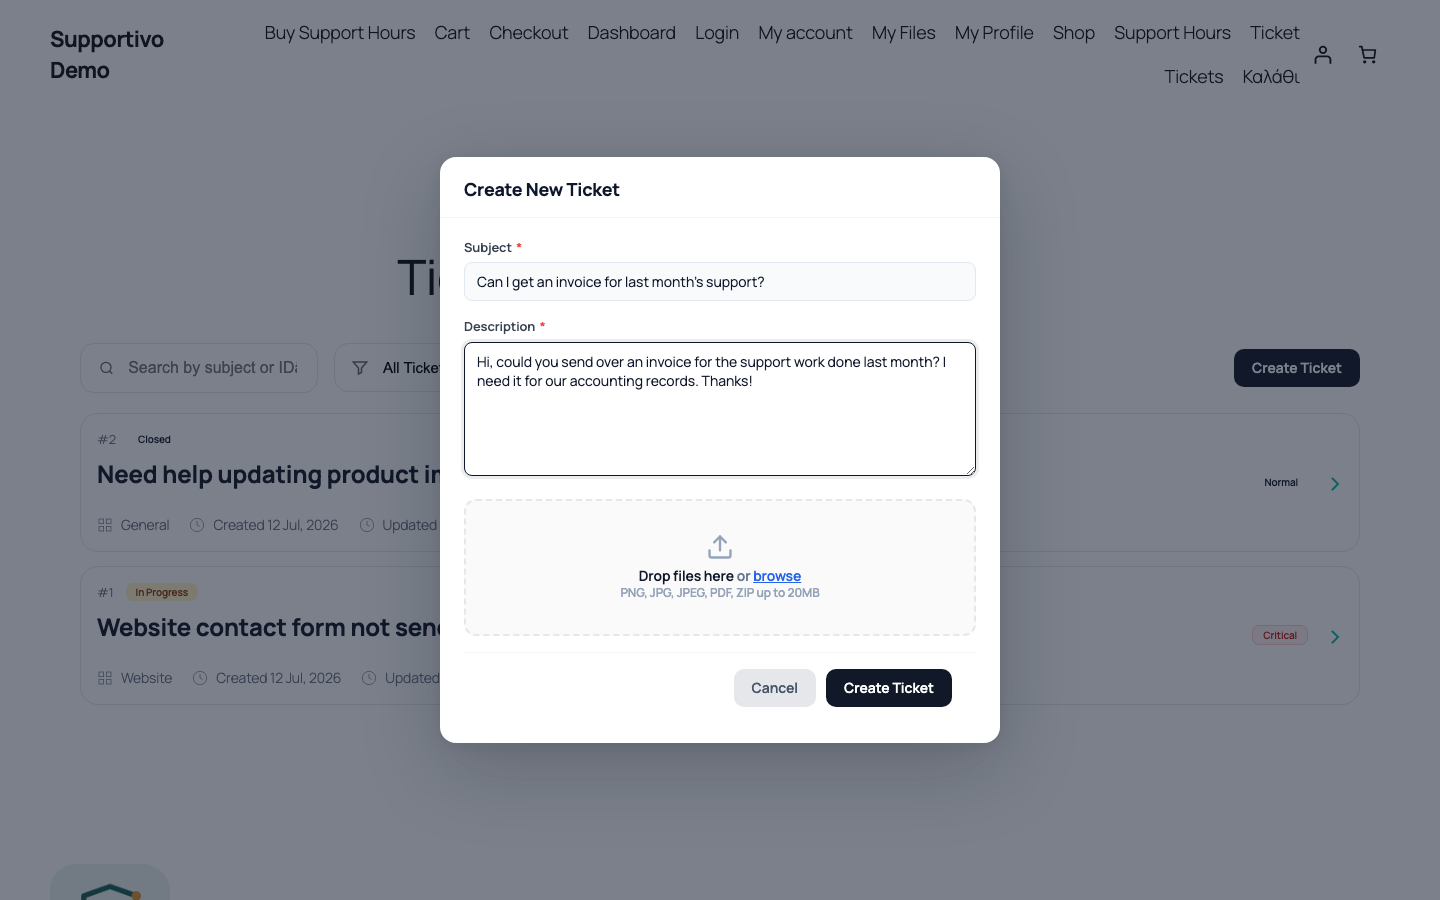 Shown with the Twenty Twenty-Five default WordPress theme active — your frontend may look different depending on your site's active theme.
If you turned on "Require hours to open a ticket" during setup, a client with zero hours left won't see the form at all — instead they see a message explaining they're out of hours, with a Buy Support Hours button (if you sell packages via WooCommerce) or a note asking them to contact you directly.
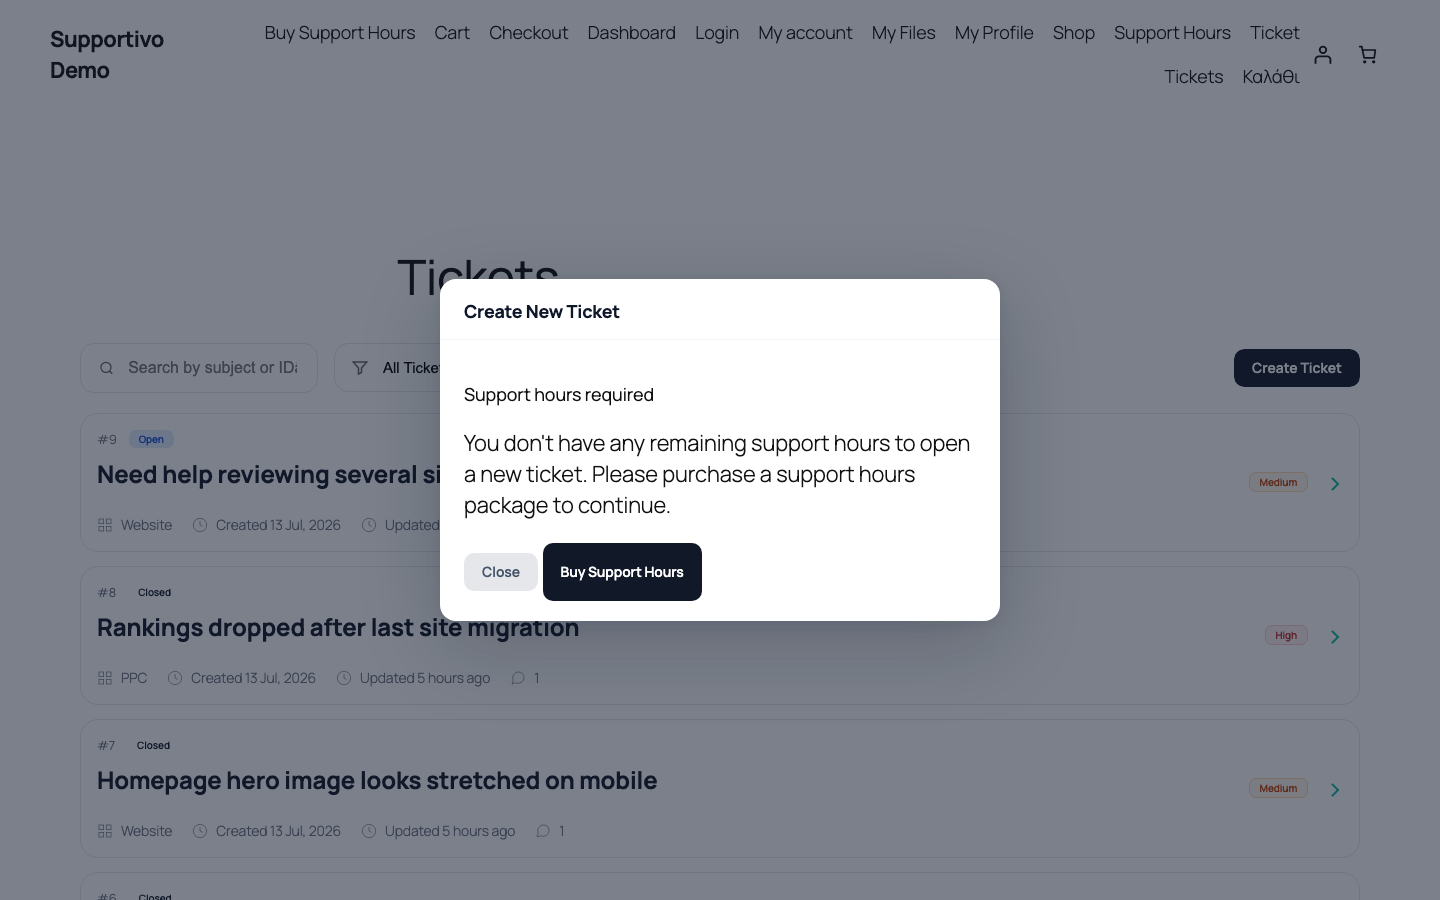 Shown with the Twenty Twenty-Five default WordPress theme active — your frontend may look different depending on your site's active theme.
The Ticket List
What clients see
On their Tickets page, clients see every ticket they've opened, with a search box (by subject or ticket ID) and a status filter dropdown.
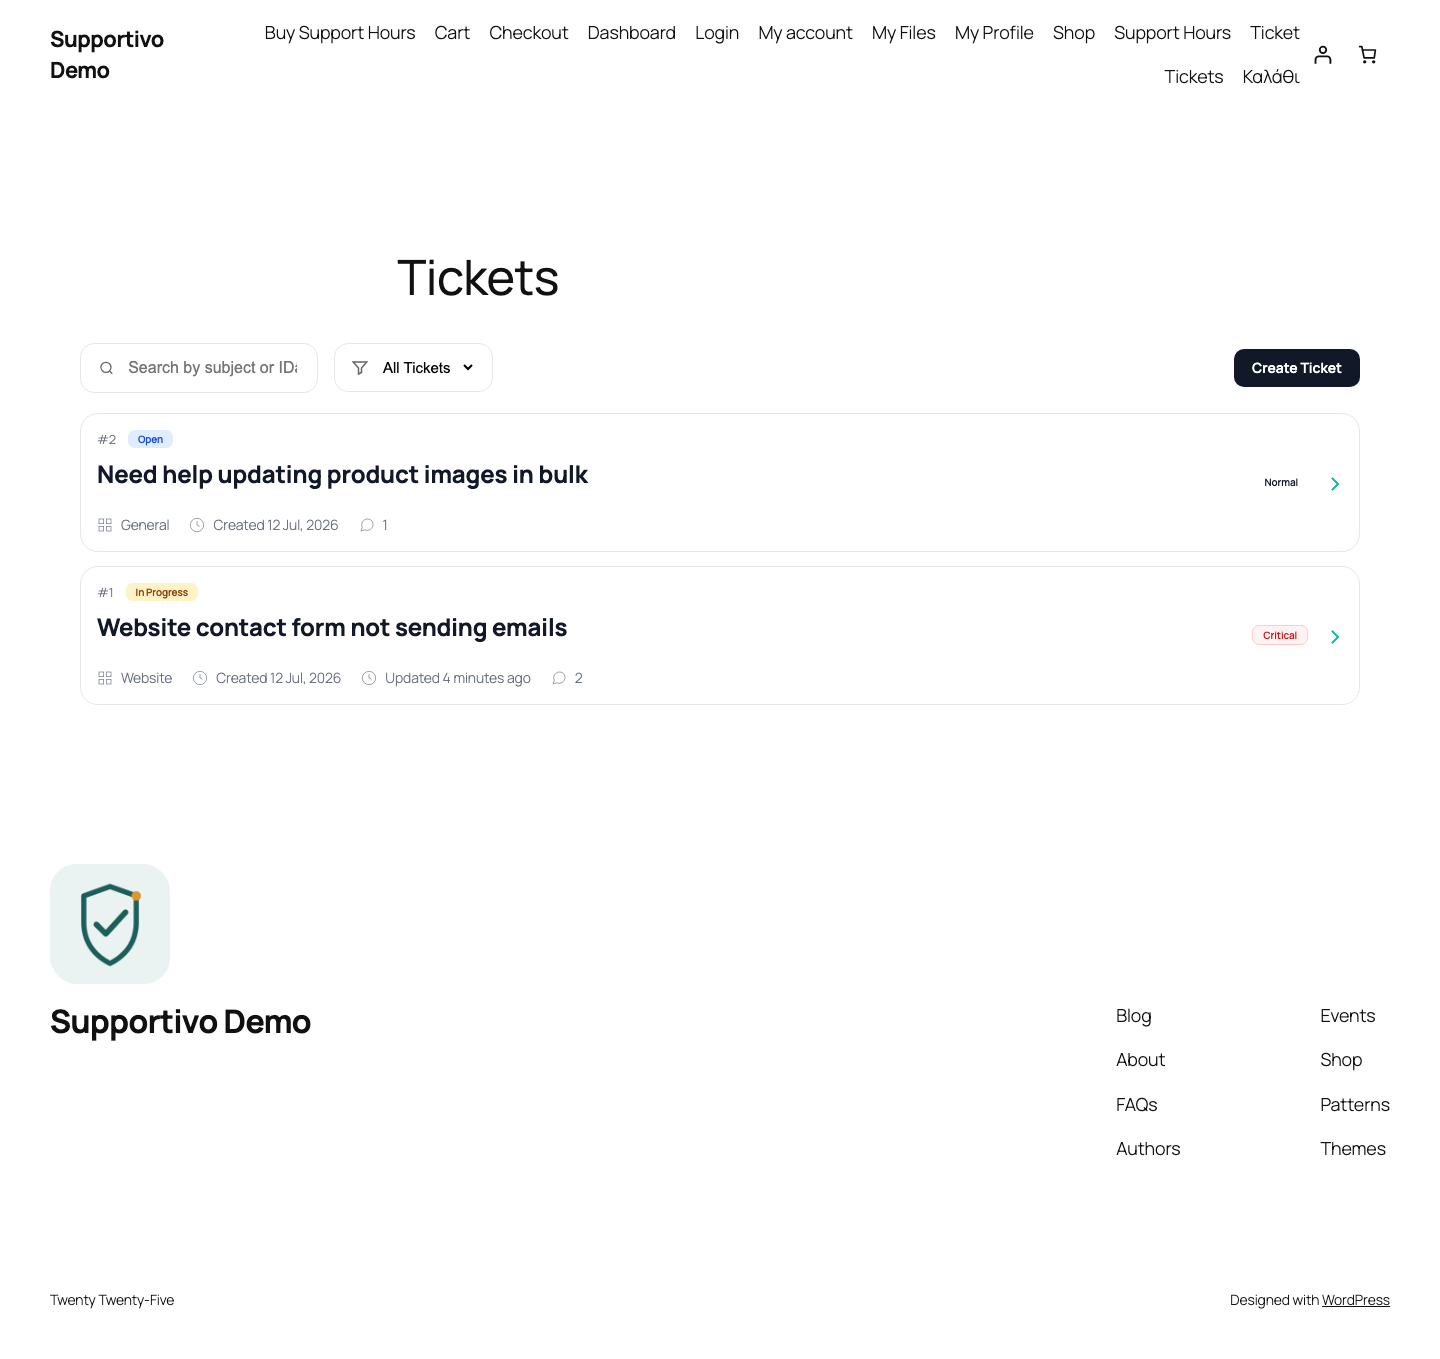 Shown with the Twenty Twenty-Five default WordPress theme active — your frontend may look different depending on your site's active theme.
What Admins see (wp-admin)
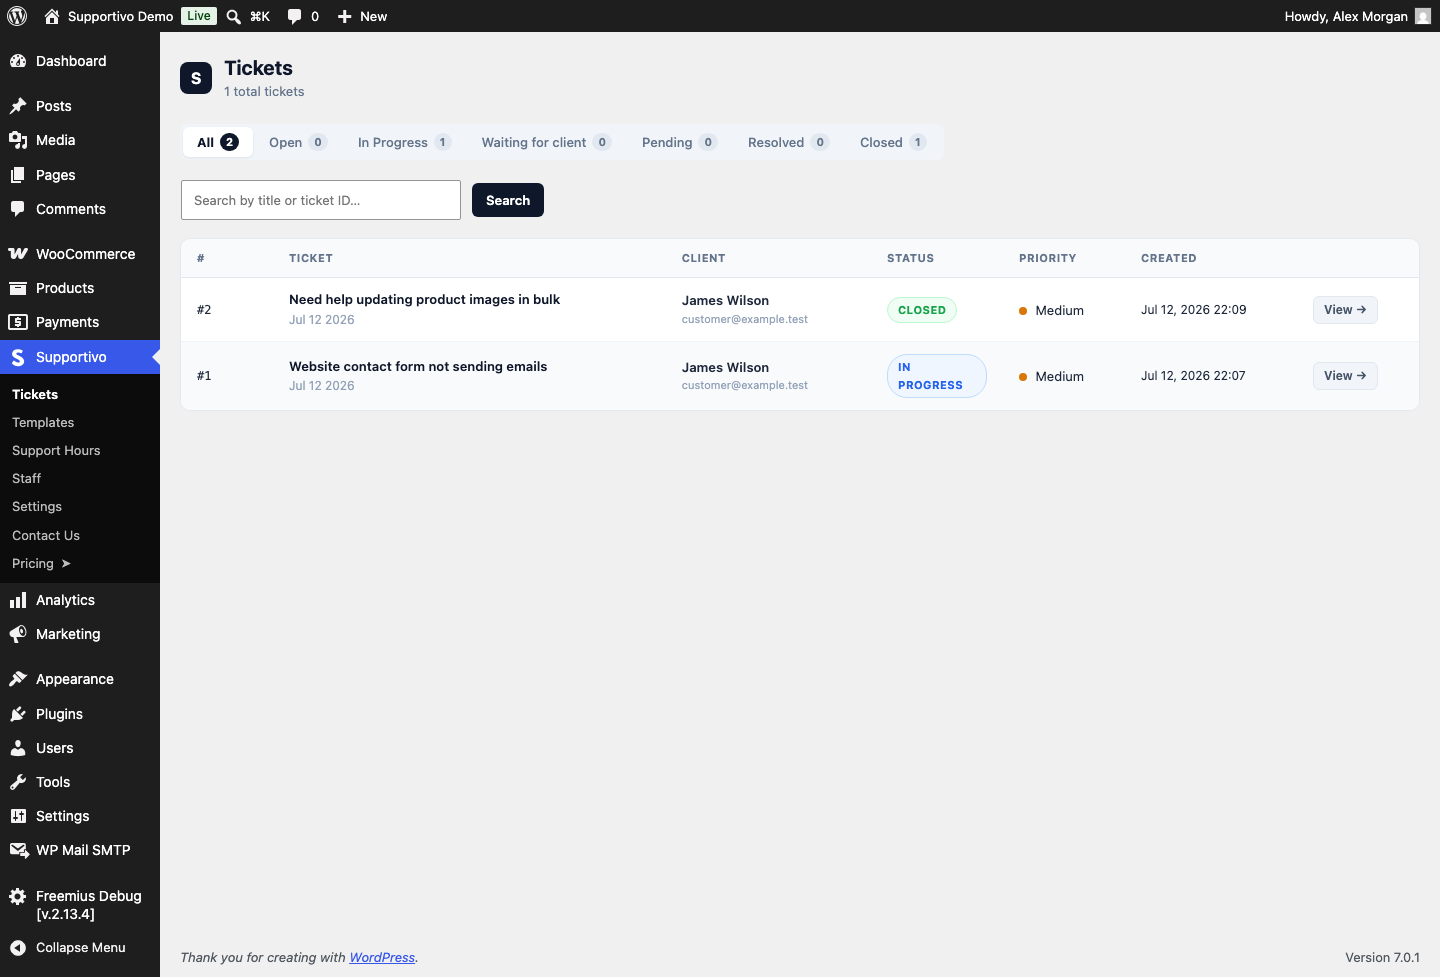
From wp-admin → Supportivo → Tickets, an Administrator sees every ticket across all clients, with:
- Status counts at the top, so you can see at a glance how many are open, in progress, etc.
- A status filter to narrow the list down.
- Search, by subject text or by exact ticket ID (typing a number searches by ID).
- Each row shows the ticket's status and priority as color-coded badges, so you can scan the list quickly without opening every ticket.
Administrators also have the rest of the Supportivo wp-admin menu available — Templates, Support Hours, Staff Management, and Settings — none of which a Staff/Agent account can see.
What Staff/Agents see (frontend portal)
Support agents (the Staff/Agent role) work from the same frontend portal your clients use — they don't get wp-admin access at all. Once logged in, though, their Tickets page isn't limited to "their own" tickets: it shows every ticket across every client, same as the admin view above, plus the same reply tools clients have.
Staff/Agents also see two things clients never do, both covered in detail below:
- The "Needs hours review" badge on tickets that need a follow-up.
- The Log support hours action, for logging time on a ticket the client already closed themselves.
Replying to a Ticket
Opening a ticket shows the full back-and-forth conversation, oldest message first, with a reply box at the bottom.
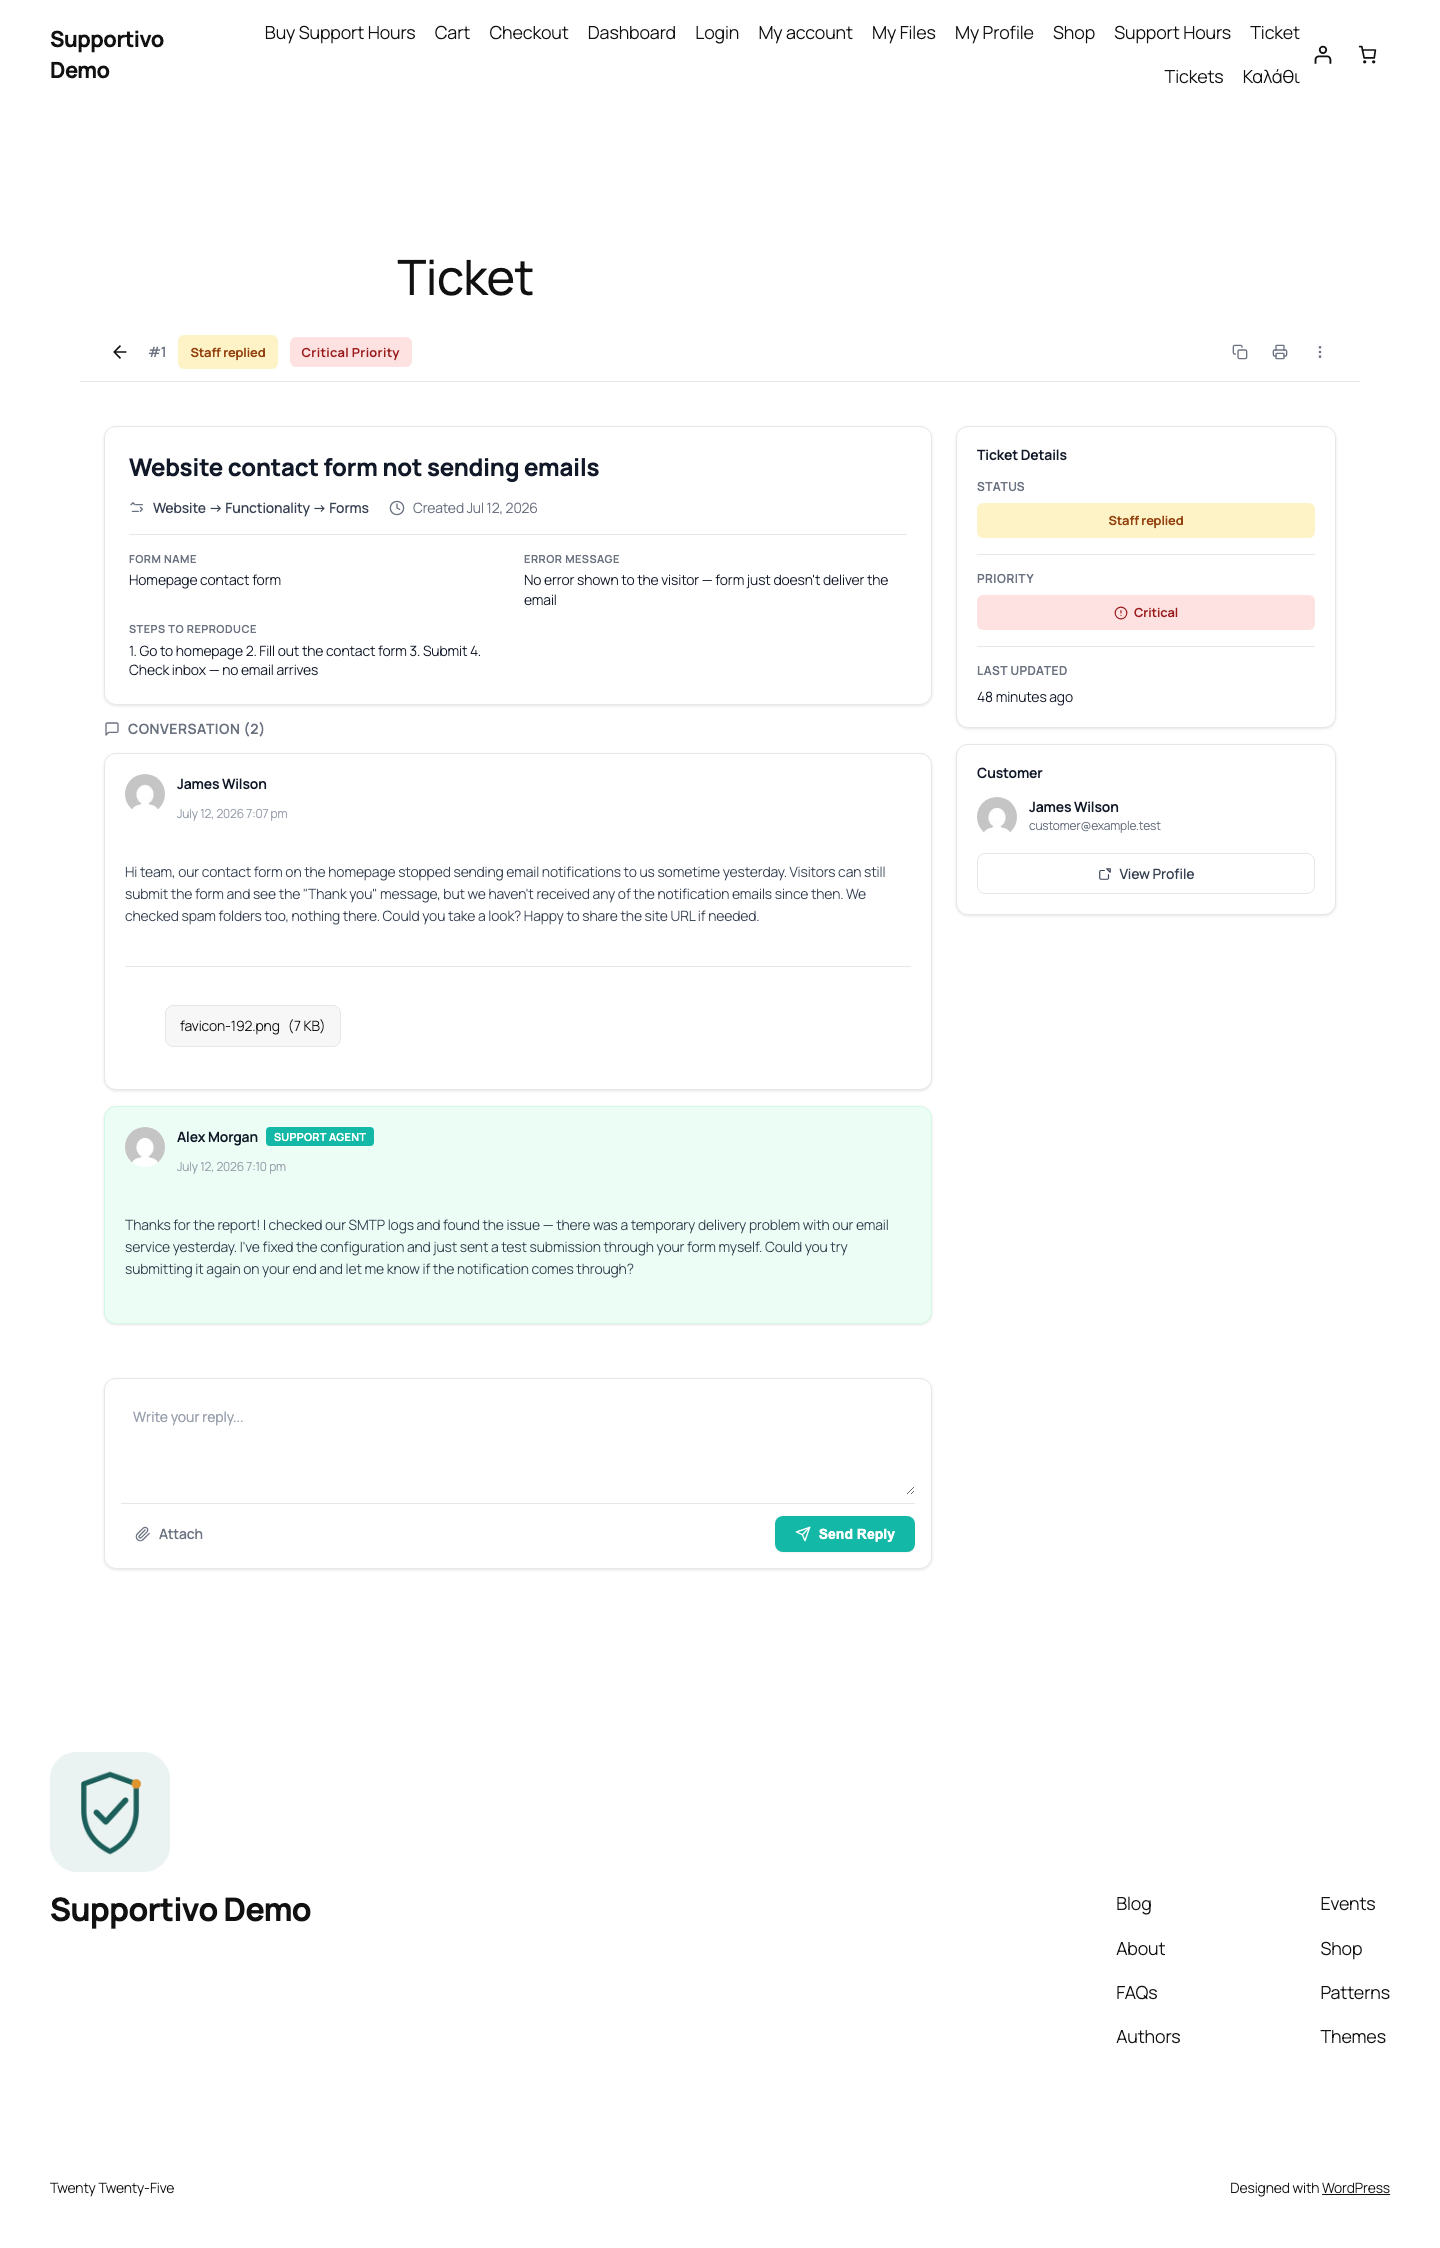 Shown with the Twenty Twenty-Five default WordPress theme active — your frontend may look different depending on your site's active theme.
- Type your reply in the text box.
- Click Attach to add files — see Attaching Files to a Reply below for exactly how the picker works. (This is only available if File Manager is enabled.)
- Click Send Reply.
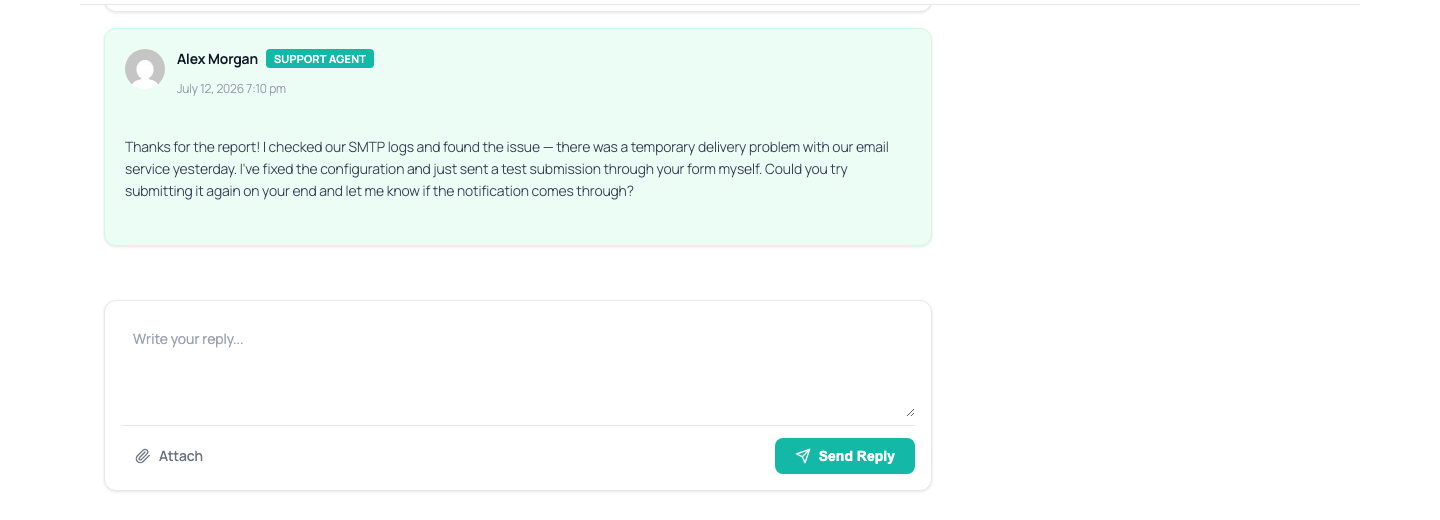 Shown with the Twenty Twenty-Five default WordPress theme active — your frontend may look different depending on your site's active theme.
Attaching Files to a Reply
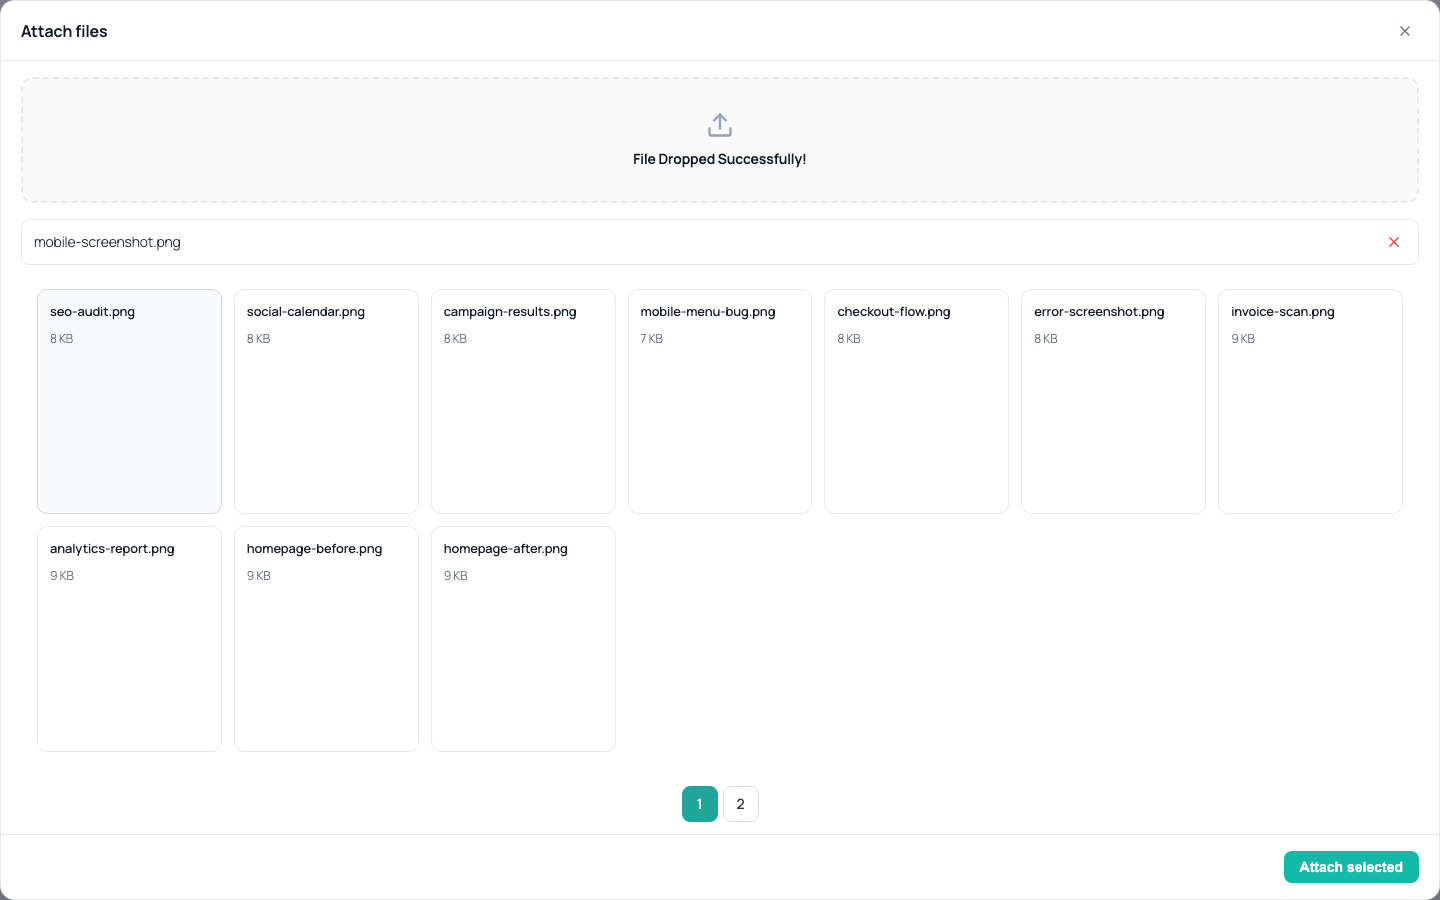
Clicking Attach opens a single picker with everything you need in one view — there's no separate screen or tab to switch to first:
- Reuse a file you already uploaded — every file already in your My Files library shows up as a selectable tile below the drop zone. Click one to select it (it highlights), and click it again to deselect. There's no limit to how many you can pick at once.
- Or upload something new — the same picker has a drop zone right above the file list, so you can drag a new file in (or click browse) instead of, or alongside, reusing existing ones.
- Mix and match freely — you're not limited to one or the other in a single reply. Select two existing files from the library and drop in a brand-new one, and all three go out together.
Once you click Attach selected, everything you picked — reused files and newly uploaded ones alike — appears as a small removable pill under the reply box, so you can double-check (or remove one) before sending.
 Shown with the Twenty Twenty-Five default WordPress theme active — your frontend may look different depending on your site's active theme.
Sending a reply automatically updates the ticket's status — you don't need to change it yourself in the normal back-and-forth:
- When staff replies, the ticket automatically becomes "Staff replied" (called "In Progress" in wp-admin — see the status reference below).
- When the client replies, the ticket automatically goes back to "Open."
You may see a ticket described as "Waiting for client" in the status reference below — this is a real, recognized status in the system. As of this version, though, there's no button in the interface for staff to set it manually; it isn't something you can currently trigger yourself.
Closing a Ticket
Closing works differently depending on who you are, and whether Support Hours is enabled.
- Staff/Admin see a Close ticket option in the "…" actions menu, on any open ticket.
- Clients now see the same Close ticket option on their own tickets — a client closing their own ticket is never asked to estimate time spent; that isn't theirs to judge.
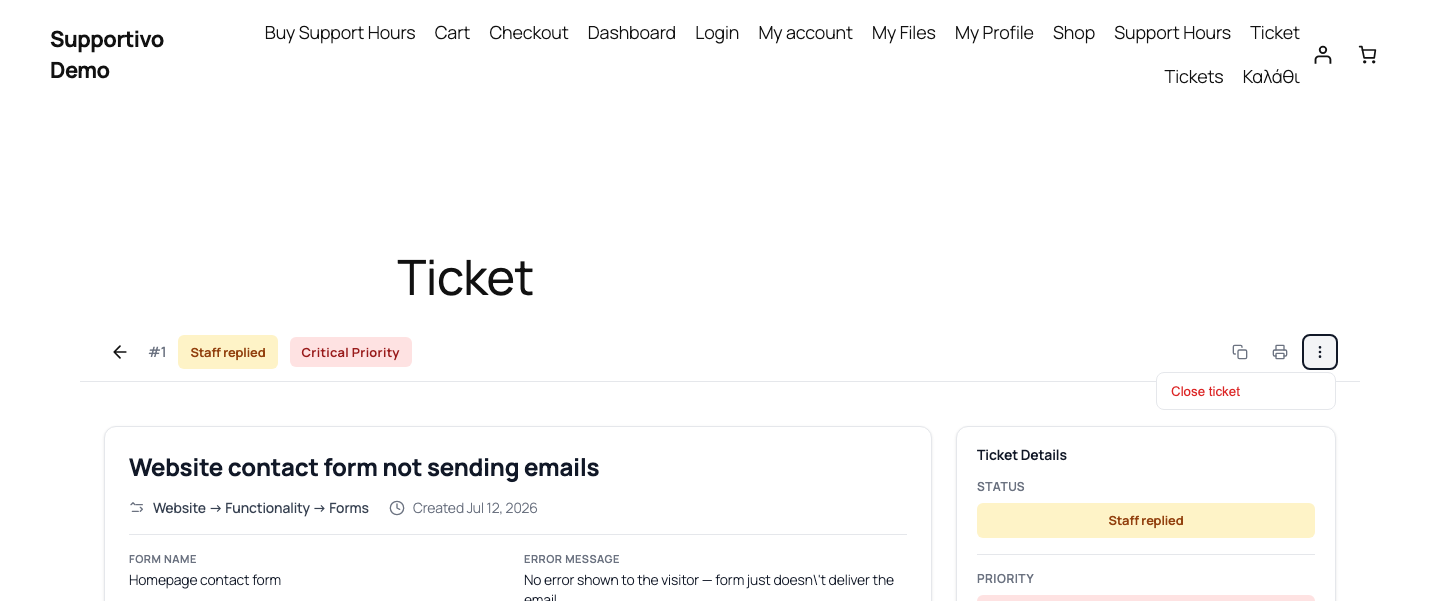 Shown with the Twenty Twenty-Five default WordPress theme active — your frontend may look different depending on your site's active theme.
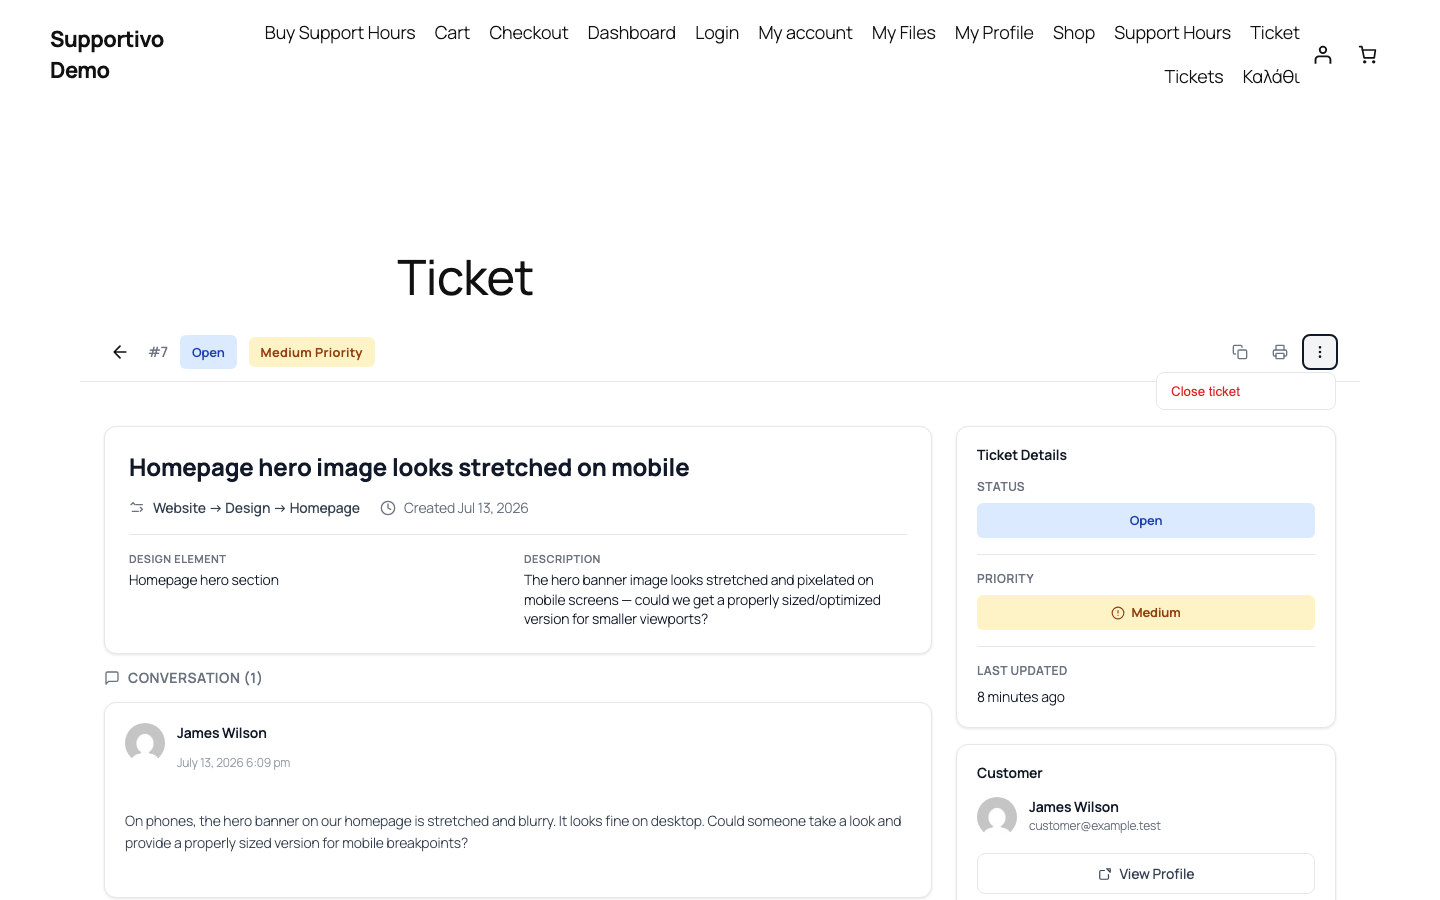 Shown with the Twenty Twenty-Five default WordPress theme active — your frontend may look different depending on your site's active theme.
What happens next depends on who's closing the ticket:
- Staff/Admin are asked how many minutes were spent on the ticket before it closes, and that time is deducted from the client's support hours balance right away.
- The client (ticket owner) closing their own ticket is never asked for minutes at all. The ticket closes immediately and gets flagged "Needs hours review" so your team can log the actual time afterward.
- If Support Hours isn't enabled, closing is immediate either way — no dialog, no minutes, for anyone.
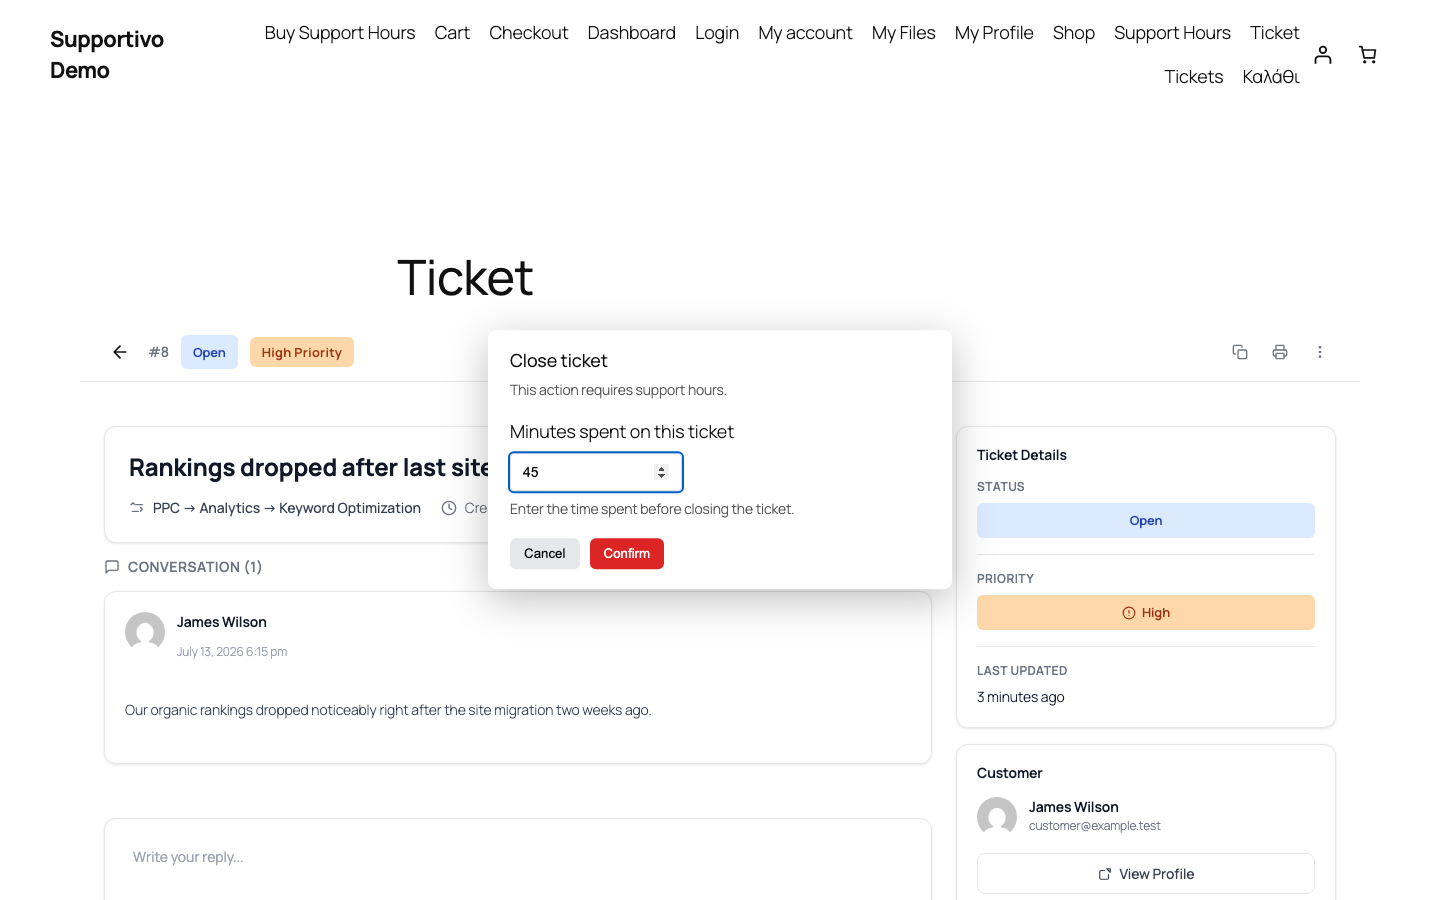 Shown with the Twenty Twenty-Five default WordPress theme active — your frontend may look different depending on your site's active theme.
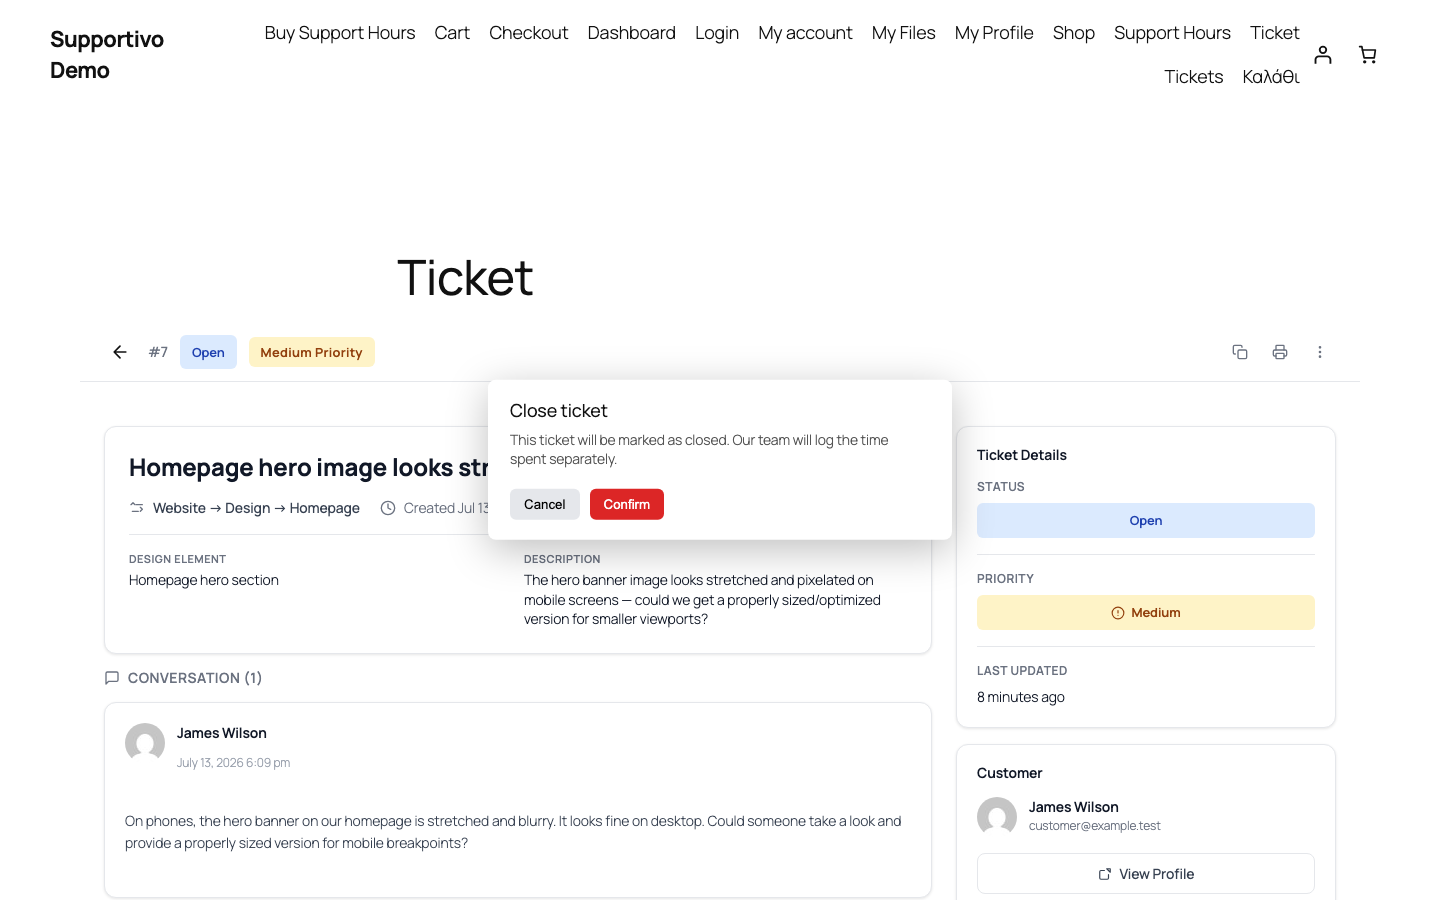 Shown with the Twenty Twenty-Five default WordPress theme active — your frontend may look different depending on your site's active theme.
The "Needs hours review" badge
When a client closes their own ticket while Support Hours is enabled, the ticket is flagged for staff follow-up. This shows as a "Needs hours review" badge — visible only to Staff/Admin, never to the client — in both:
- the wp-admin Tickets list, and
- the frontend Tickets list, when a Staff/Agent is logged into the portal.
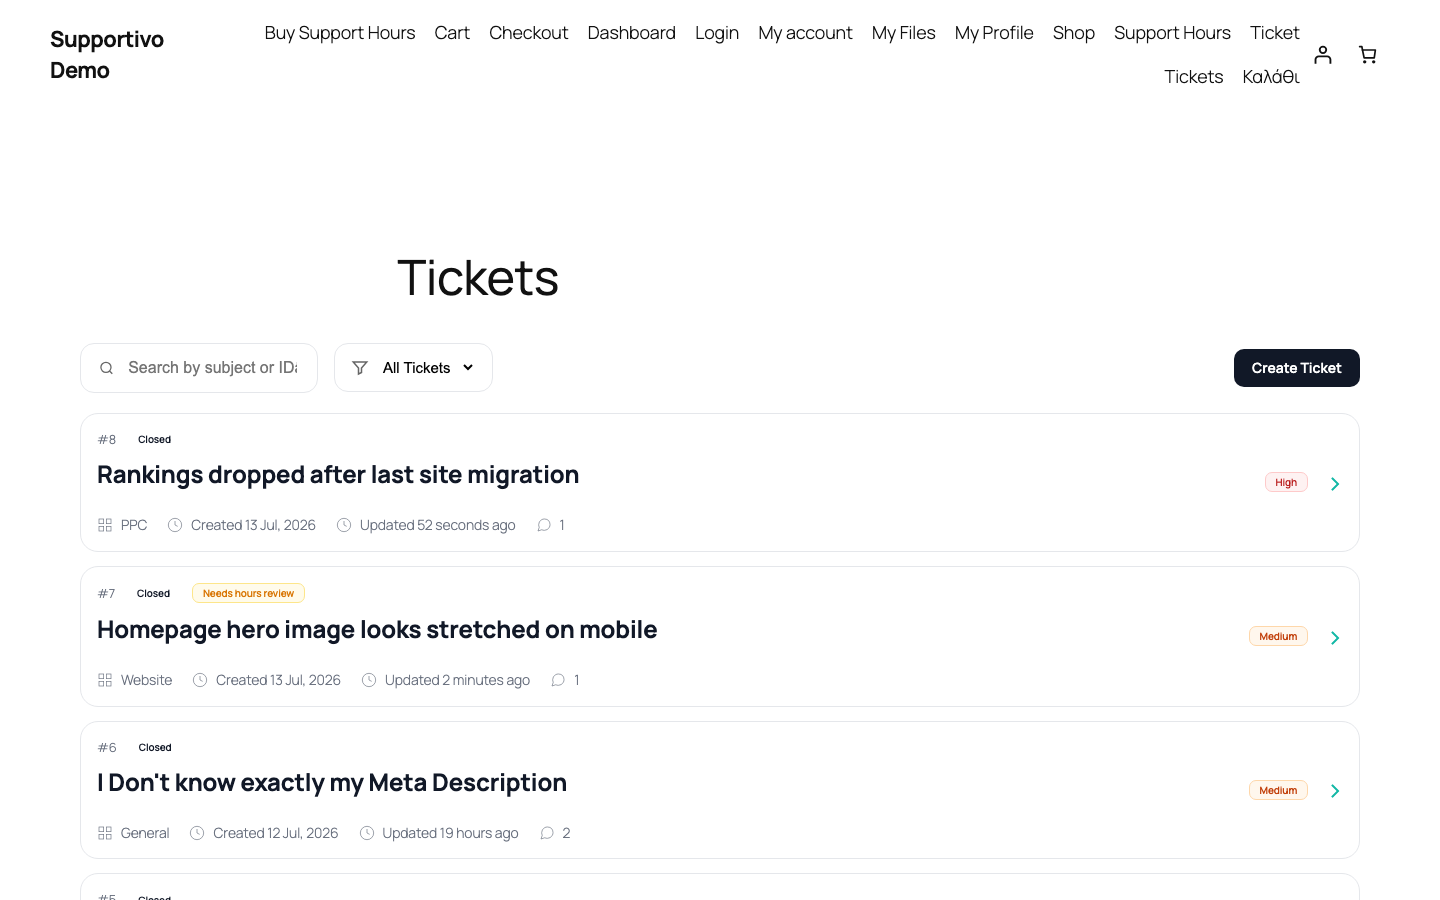 Shown with the Twenty Twenty-Five default WordPress theme active — your frontend may look different depending on your site's active theme.
Logging hours after the fact
On a ticket flagged "Needs hours review," Staff/Admin get an extra Log support hours option in the "…" menu. Clicking it opens a dialog asking for the minutes actually spent — once submitted, that time is deducted from the client's balance and the "Needs hours review" badge clears. The ticket itself is already closed at this point; logging hours doesn't reopen or otherwise change its status.
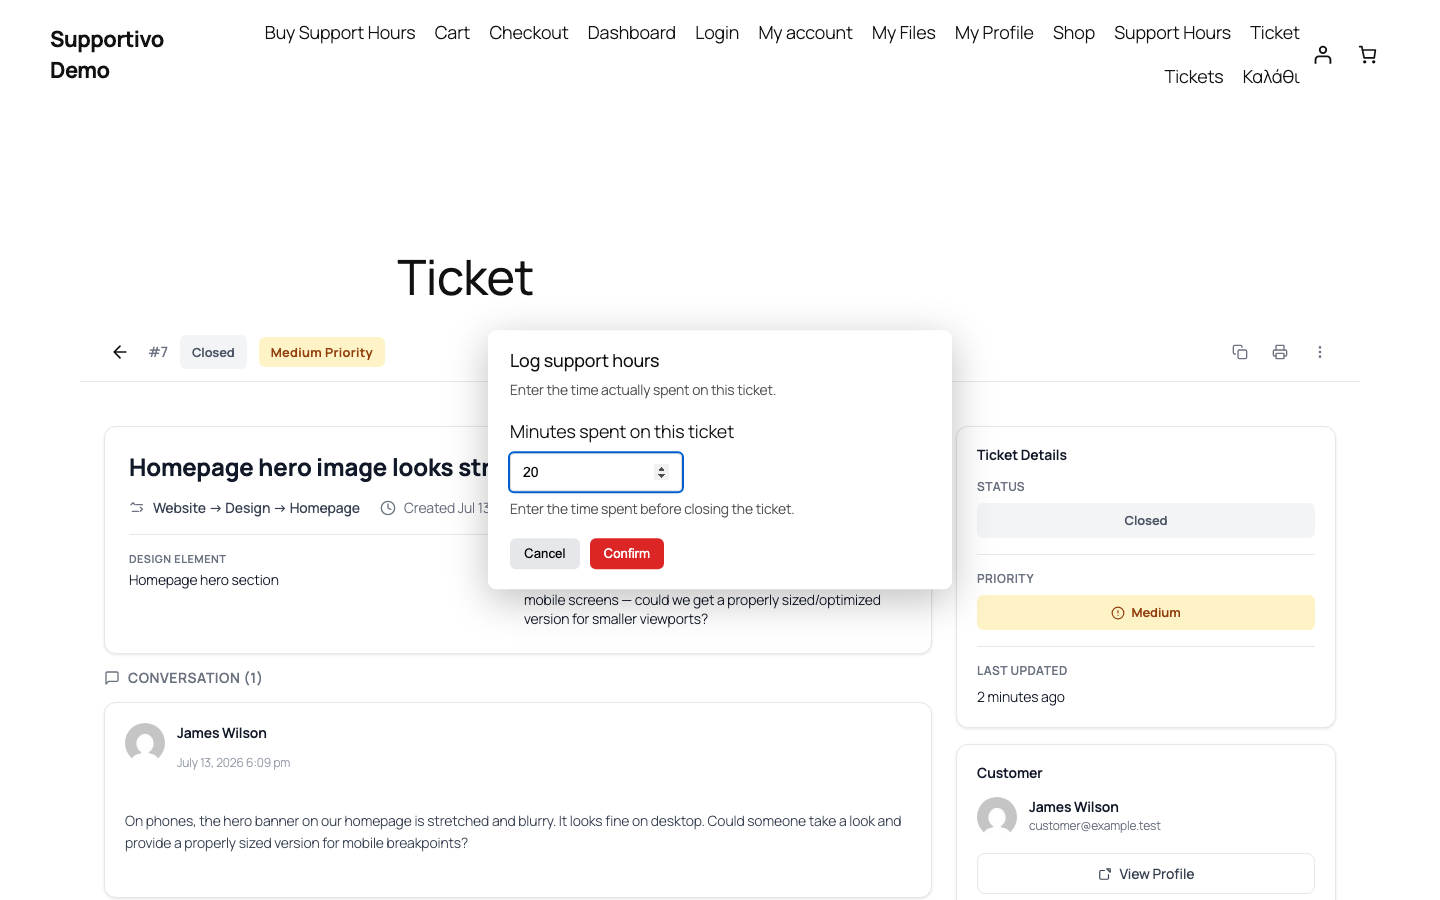 Shown with the Twenty Twenty-Five default WordPress theme active — your frontend may look different depending on your site's active theme.
Managing Email Notifications
Each client can turn off their own email notifications from My Profile, using a single "email notifications" checkbox.
Turning this off only stops emails going to that one client. It has no effect on the emails your staff receive when a ticket is created or updated — those always go out regardless of any client's personal notification preference.
Ticket Status Reference
| Status | What it means |
|---|---|
| Open | A new ticket, or one where the client just replied — it's waiting on your team. |
| In Progress (clients see this labeled "Staff replied") | Your team just responded — the ball is in the client's court. This is a single underlying status shown with two different labels: wp-admin and status filters call it "In Progress", while the client-facing portal calls the exact same status "Staff replied." |
| Waiting for client | A recognized status meaning the ticket needs more information from the client — currently not settable from the interface (see note above). |
| Pending | A recognized status in the system — see the note below, it isn't set by anything currently. |
| Resolved | A recognized status in the system — see the note below, it isn't set by anything currently. |
| Closed | The issue is resolved and the ticket is done. If staff closed it with Support Hours enabled, the time spent has already been deducted; if the client closed it themselves, it may still be flagged "Needs hours review" until staff logs the time (see above). |
"Pending" and "Resolved" are recognized statuses in the system — you'll see them listed as filter options — but as of this version, no current feature ever sets a ticket to either one, the same way "Waiting for client" is recognized but not yet settable. Don't be surprised if you never see a ticket land in either state; that's expected for now.
Priority (Low, Normal, Medium, High, Urgent) is shown as a colored badge next to the status on every ticket, so you can spot the urgent ones at a glance in the list.